|
|
|
I'm in the process of building a V6
powered MGB using a 3.4L V6 from a Camaro as well as a T5 tranny from
the same year 94 Camaro. One aspect of this build has been to
produce a custom dashboard. To accomplish a more "retro" look
I have chosen to use the metal dash backer from the pillow dash used on
B's from '68 to '71.
Some of you may have seen similar
conversions using this backer and all I have seen allowed the tops of
the mounting studs to show thus having a row of what look like large
rivets running across the top of the dash. I wanted both a more finished look as
well as a look more like the early metal dashes which have a padded rail
across the top of the dash which blends in nicely with the door cappings
and rear surround as they are all vinyl on older cars.
Here's what I did
:
I used 1/8 inch plywood for both the
backer and the "brow" of the pad I constructed. I had
this on hand from another project, and I bought it from Aircraft Spruce (
www.aircraftspruce.com ). This was a 2 foot by 4 foot piece and was expensive to ship.
The same
stuff is available in large craft stores and/or marine supply houses.
A
couple of 2x2 sheets would work but would mean you'd have a seam in the
middle of the pad which probably isn't a big deal since this whole thing
gets fiber glassed. Foam board available at hobby shops would also
probably work. It's a paper faced foam sandwich.
I started out by bolting on the stripped
and primed steel backer to the car and putting beneath it a strip of polyethylene
sheeting which covers the top of the dash and hung down into the car.
The plastic will allow you to epoxy glue and fiberglass the pad while on
the car and not gob up everything with resin. You also want to make sure
the dash has the screws fitted to the mating holding brackets so the
dash will have the same fit and curvature it will when finally mounted
on the car.
The first step to making the dash backer
is to make a pattern using ordinary corrugated cardboard. You need a
strip about 6-8 inches wide and 4-5 feet long. Holding this in position
and bending it to the contour of the area where the rivet heads show you
use a pencil or marker to trace both the top and bottom curves where the
pad will fit. This doesn't need to be totally exact and using it to cut
the plywood it is always better to cut a bit larger and sand or trim for
the final fit. What you end up with is a long strip which is about an
inch wide and has a gentle curve from one side to the other.
Now use a scissors or razor knife to cut
his out and match it up to the dash by taping it down a few places and
trim as necessary.
Next you want to transfer this pattern
onto the plywood. This is more easily accomplished if you use masking
tape every 6-8 inches to hold the pattern down on the plywood for
tracing, otherwise the cardboard will tend to flex as you try to draw
around it. You can fill in the pencil lines once you get the pattern
traced between the tape strips and the pattern off the plywood.
Now use a saber saw with a fine cut
wood blade and cut out the backer, again erring to the big side and then
trim and sand as needed.
Mount the wood strip to the dash with
masking tape strips and look and mark where it needs trimming and
sanding. Take it of and sand the edges. I used a belt sander clamped to
a table and used the front roller like a drum sander to get a closer
shape. It is important that the top edge comes even with the dash top
and doesn't stick above it because we will be adding a top to this again
cut from plywood. This takes a bit of trial and error and if you sand it
a bit too much it's no big deal since the glue and fiberglass is going
to fill in.
The way I wanted this pad to work is that
I wanted it completely separate from the dash and not glued to it.
For
this design I needed to have a way to bolt it onto the dash from behind
after the dash is mounted.
To do this I used what are known as weld
nuts. These look like a little top hat, having a metal flange and a
tubular section sticking out of it which has threads inside of it.
I
used 3 of these with 1/4-20 threads.
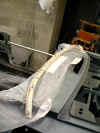
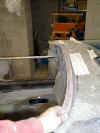
I placed my backer onto the dash, again holding with tape and located where the mounting bolts would fit. I chose two locations on the outside, each being about 1 and 1/2 inches to the inside of the outermost dash mounting studs and one in the center about an inch and a half to the right of the center stud. I cut 3 scraps of plywood the same width as the backer and 2 inches long. These I centered over the mounting locations and epoxied to the backer. These two pics will give you a better idea of where we are headed here.
Once the epoxy hardens, again mount
the backer and mark where the bolt will come thru from the back. Drill a
1/4 inch hole thru the 2 layers of wood and the two layers of metal in
each location.
Removing the backer I then mounted the weld nuts in the holes. I bent the flanges on each side of the nuts so the would dig into the wood and epoxied them in place. You could do the same thing with 1/4 inch nuts by just enlarging the hole so the nut will fit into the scraps we glued on but not thru the backer. Put a bolt in the nuts or inserts so they don't get epoxy on the threads.
Once this is dry, you can bolt the backer
in place by using 1/4-20 bolts from the back side thru the top of the
dash which is how it is shown in the pics. You want to add another strip
of poly plastic under the backer because we do not want it glued to the
metal in the subsequent steps.
The two pics above and this one
 show adding the "brow" to the backer. Again use a long 6-8 inch wide strip of
cardboard and hold it on the top of the dash covering the defroster
outlets and trace the curve of the backer from one side to the other.
The brow is going to mount on top of the backer and it will also extend
towards the defroster ducts by about 1/8 inch so it is actually on top
of the front cowl covering the seam between the dash and the cowl.
Not
too much or it will end up interfering with the defroster escutcheon plates.
Use a compass to trace the curve you got
by marking the cardboard about 1 and 1/2 inches inside the curve. In
other words you want to have two concentric or parallel lines about this
width apart. Once you cut this pattern out it will be
traced onto the plywood to form the top or brow of the pad. Save the
pattern for a later use.
Trace the brow pattern onto the plywood
and cut and trim as before. What you want is a nice gentle curve with no
dips in it since once it is upholstered only some really bad gouges
would show. I next used some small brads nailed down
thru the brow while epoxying the brow to the backer. It was also clamped as shown in the
pic.
Now we want to add some foam to the
wooden backer. What I used was an insulating foam used to sheath houses.
This is an isocyanate foam. DO NOT USE STYROFOAM! IT MELTS WHEN FIBER GLASSED.
The isocyanate type should be available at most home supply or lumber
yards or get "real" glassing foam at www.fibreglast.com
.
Use the pattern you saved from cutting
the brow and cut a couple of curved pieces like it from the foam.
It is about 1/2 inch thick and it will take a couple of layers to make
it thick vertically as the backer is wide. In this pic you see the foam
layers glued to the backer and held with duct tape. I used liquid nails
for this.
Once this is dry you want to fiberglass
the whole top surface of the pad, both the wood and foam, with a
layer of cloth and resin. Again Fiber Glast is a good source for non
directional mat which will follow any curve but the stuff you can buy at
any auto parts will work. Make sure to go beyond the forward surface of
the brow a bit to cover the front edge. This will all be sanded to shape
when dry.
Remove the pad from the car when the
glass is dry. Sand the front and back curves and the top. Sanding and
cutting the foam is done now as well and here you will have to use your
own preference as to what shape you want for the final look. I made mine
relatively small and sloped the underside pretty drastically. The pads
on the real metal dash cars are more rectangular in shape.
This is what mine looked like after
shaping and sanding
Now if you did a real nice shaping and
sanding job you could probably use the pad as is and upholster it.
I was
concerned that after it was upholstered anything banging it would dent
the foam underneath. What I did then was to fiberglass one layer over the bottom side
of the foam as seen here
This last shot shows the finished pad
bolted on the car. You can see the small cross section I chose.
I can
make it heavier with padding and I plan on having mine black with red
piping along the front to match the rear trim cover which came with my
Moss panel set.
Hope you liked the idea!
|
|
NOTE: Tom Rynne is famous for the "Windblocker", available everywhere. He also produces some specialty parts for Chrome Bumper conversions, and has recently bought the molds from British American Motors, including the mold for the MGC hood. His email is metalrep@adelphia.net |


