|
Back in 1995, I took my Vermillion Red 1979 MGB roadster off the road so its 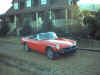 speedometer
wouldn't 'roll over'; it had just passed the 96,000 mile mark. She was
my daily driver during good weather for as long as I can remember, and she had
never disappointed me or left me stranded. Before I retired her,
however, I redid her body with a beautiful new paint job. And, I
properly prepped her for her hibernation. Now, almost 10 years on and
even though I went through all the proper steps to store her, I'm not sure
that it was such a good idea to just park her in a corner of my garage. speedometer
wouldn't 'roll over'; it had just passed the 96,000 mile mark. She was
my daily driver during good weather for as long as I can remember, and she had
never disappointed me or left me stranded. Before I retired her,
however, I redid her body with a beautiful new paint job. And, I
properly prepped her for her hibernation. Now, almost 10 years on and
even though I went through all the proper steps to store her, I'm not sure
that it was such a good idea to just park her in a corner of my garage.
Why? Because, as Jerri & I look forward to my retirement and the
"15,000 Mile Circle" trip through the western part of the US,
Canada, and Alaska that we've planned to celebrate that event, I want
Vermillian Red to be part of it. She'll be the dinghy towed behind our
RV on a purpose-built trailer. However, she's an old girl who will need
some serious prepping to make the trip and perform as she did every day of her
life. I've got to overcome 10 years of sleep to ensure Jerri & I
enjoy her like we did "back in the day".
At the same time I'm going through all her systems to ensure we will have fun
with her, lots of my fellow MG-dom
citizens are also wrestling with the same situation - bringing an old car back
to life. I have standard things I do to all the old cars I acquire to
see if they're gonna be restorable or are gonna rest in peace in my MG
Graveyard. I also kept a listing of everything I did to Vermillion Red
when I put her up so those have to be reversed.
With all that in mind, I decided to develop a comprehensive checklist for "awakening
a sleeping MGB". Every car and every situation is different but
if you follow my checklist, you'll have no trouble reviving a well sorted out
car.
Remember, however, Vermillion Red was in excellent condition when I put her
up. I had - from day 1- always done all maintenance as outlined by
British Leyland in my owners handbook, had made any repairs necessary with
quality, OE parts, and had kept her 100% original. She never had
anything except 93-octane pumped into her gas tank, I always used either
10W-40 or 20W-50 Castrol in her engine and tranny, and she was never wrecked
or abused.
And, I'm gonna lavish the same amount of time and energy bringing her back to
life. This won't be a quick Saturday afternoon of sticking a battery in
her, squirting some starter fluid up her carb & firing her up. This
will be a methodical refurbishment of all her operating systems.
As always, I keep a Bentley manual open to the section on which I'm working to
ensure I don't miss a step. And, my checklist is not designed as a
step-by-step guide for how to accomplish each item. Its only a tool to
remind me of what to do, not how to do it.
So, let's wake her up:
____ Put the car on 4
jack stands & remove wheels.
____ If there was an old battery in her, remove it to use as a core for
a new battery.
ENGINE COMPARTMENT
____ Disconnect fuel lines at carbs.
____ Remove spark plugs & turn engine over by hand checking for
compression at
each spark plug hole (I'm not
interested in the amount of compression, just that
I still have it!).
____ Install new battery (DO NOT ATTEMPT TO START ENGINE!).
____ Turn ignition key on & allow fuel pump to drain any gas
remaining in the tank
(&, in the event you
didn't drain it before laying car up, you'll probably have
'dead' gas in
there.)
____ If fuel pump doesn't operate, stop & rebuild fuel pump and
repeat process of
draining gas tank.
While you're under there, replace all flexible gas lines to fuel
pump.
____ Adjust valves.
____ Change engine oil and filter. (In cold months, I use 10W-40 Castrol;
in warm
months, I use 20W-50 Castrol.)
____ Install new, properly gapped spark plugs.
____ Rebuild distributor (if electronic, check manual closely).
____ Install new spark plug wires.
____ Check the ignition circuit for proper operation (AGAIN: DO NOT
ATTEMPT TO
START ENGINE! At this point,
all I want to know is if I have 'fire' at the plugs.)
____ Drain all fluids (radiator, engine, transmission, rear end,
brakes/clutch)
____ Inspect radiator for signs of leakage (the proper way to store a
radiator is with
anti-freeze inside; you can
tell if there's been any leakage by the tell-tale wierd,
green patina
on the core or along the edges of the tanks.). If there are signs of
leakage, remove radiator for
cleaning, pressurizing, and repair.
____ Back flush the engine cooling system to remove any built-up crud.
____ Replace engine thermostat.
____ Remove the plug in the water pump & add a bit of grease.
____ Remove all belts from front of engine.
____ Bench check alternator/generator for proper operation.
____ With proper spray cleaner & one of GEM
Enterprises' special purpose
brushes,
clean all Lucas wiring
harness connectors. Once cleaned, coat them with a
LIGHT film of conductive
grease (I mean every one you can see with the hood
up! Take 'em apart &
clean both ends of the bullet connectors). Pay especially
close attention to the fuse
block.
____ Replace all belts with new ones and reinstall alternator/generator.
____ Reinstall the radiator along with all new hoses.
____ Fill windshield washer tank.
____ Refill the cooling system with the proper mixture of water and
anti-freeze.
____ Remove carbs & rebuild/clean them as necessary. Replace
air filters.
____ Inspect engine mounts & replace as necessary.
____ Replace all fuel/vacuum lines in engine compartment.
____ Replace fuel filter.
____ If so equipped, renew all emissions items to include recharging
charcoal
canisters. If equipped,
remove the hoses from the air pump & spray lithium grease up inside the
pump.
____ Turn engine over with ignition switch to check compression (AGAIN,
DO NOT
START ENGINE!).
UNDERNEATH CAR
FRONT
____ Remove front rotors & check for warpege.
____ Turn/replace rotors as necessary.
____ Check calipers for proper operation.
____ Replace all flexible brake lines.
____ Install new brake pads.
CENTER
____ Replace fluid in
transmission with the same oil you put in engine.
____ Grease universal joints/check for looseness.
____ Inspect transmission mounts & replace as necessary.
____ Visually inspect exhaust for rust/holes, proper installation, etc.
____ Visually inspect underside of car for rust.
____ Lubricate hand brake.
____ Clean all Lucas wiring harness connections & coat with a LIGHT
film of
conductive grease.
REAR
____ Remove brake
drums. Visually inspect & replace/turn as necessary.
____ Replace wheel cylinders (NO! Don't even try to repair - just
replace them!)
____ Install new brake shoes.
____ Replace flexible brake line on passenger side of car.
____ Drop gas tank & visually inspect for rust.
____ Remove gas sending unit & check for free operation of arm.
____ Have gas tank boiled/cleaned as necessary (I take mine to my local
radiator
repair shop).
____ Install cleaned & newly painted gas tank.
____ Replace all flexible fuel lines to fuel pump/gas tank.
____ Fill rear end with SAE 90 Gear Oil.
____ In trunk, if so equipped, replace flexible lines to vapor separator
& gas tank.
____ Put 93-octane gas in tank & pressurize fuel system to carbs.
____ Clean all Lucas wiring harness connections & coat with a LIGHT
film of
conductive grease.
____ Top off brake &
clutch master cylinders
____ Bleed clutch slave cylinder & check for proper operation of
clutch.
____ Bleed brake system starting with driver rear wheel.
____ Reinstall wheels & adjust rear brakes
DON"T TAKE OFF JACK
STANDS YET!
____ FIRE
'ER UP!
____ Allow oil pressure to come up & note where it stops at idle.
____ Allow car to idle until temperature has come up to normal operation
range.
____ Make any adjustments to carbs or timing.
____ Depress clutch & verify its proper operation.
____ Check operation of transmission through all gears.
____ Check operation of hand brake.
____ Check operation of wheel brakes.
____ TURN ENGINE OFF.
____ Visually inspect for any leakage along gas, clutch & brake
lines, at wheel
cylinders & calipers, in
cooling system.
____ Install &
balance new 185x70R14 tires (tubes also if wire wheels) - HEY!
They're probably dry rotted!
____ Install wheels, adjust rear brakes & take car off jack stands.
BODY
____ Check operation of
all exterior lights.
____ Replace windshield wiper blades & check operation of
wiper/washer system.
____ Spray lithium grease door, hood, & trunk hinges and latching
mechanisms.
____ Install one of GEM
Enterprises' emergency hood latches.
____ Lubricate top bows, seat rails & adjusters.
____ Check operation of all dash, interior, & trunk lights and
switches.
____ Clean all Lucas wiring harness connections & coat with a LIGHT
film of
conductive grease.
ENGINE COMPARTMENT
____ After engine has
cooled down, readjust valves.
____ Check/refill cooling system as necessary.
____ Check engine oil level.
NOW, its time for a short
test drive. Once around the block only. While driving, pay
particular attention to status of gauges, check for proper operation of
brakes, watch for tell-tale signs of smoke from exhaust. Back in
garage...
ENGINE COMPARTMENT
____ Recheck all engine
fluid levels.
____ Check belt tension.
____ Check clutch & brake master cylinder levels (look for signs of
leakage in
engine compartment, under
dash, and on garage floor under car).
____ Put car on jack stands.
____ Recheck rear brake adjustment.
____ Tighten lug nuts (or wire wheel center cap).
____ Put her on the ground.
At this point, feel free to drive down to the nearest filling station and fill
up with 93-octane gas. I know, I know! Some of you are going to
tell me that's not necessary. But, hey, that's all I ever put in my
cars. I personally feel its needed all the time but should be used at
least once every few tanks full.
Then, after a good wash, wax, and interior detailing, she's ready for daily
use. From this point on, follow the maintenance guidelines in your
owner's manual.
ENJOY!
Tony
|
