|
|
When I first looked at different seats for my V8 MGB, I found Martyn Harvey's article on how he fit Pontiac Fiero seats into his. I initially used it as a guide, and really appreciate that he took the time to document how he did his seats.. Now, more that 2 dozen seats modifications later and with the price of Fiero seats going up as the availability goes down, I've had to rethink how to make Fiero seats fit in an MGB without breaking the bank.
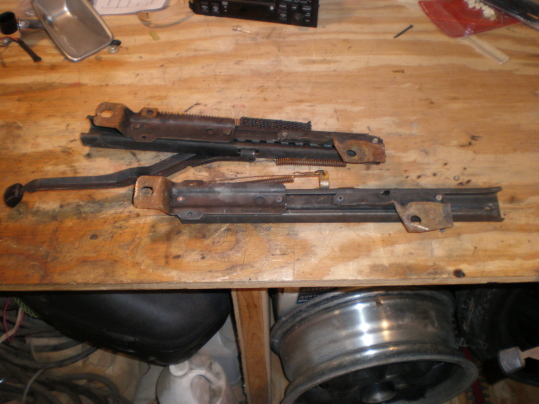
So, the first article is Martyn's, and the second one, with photos of the process, is my modification of his principles. You'll want to follow Martyn's guidelines until you start modifying the runners themselves and then you may want to incorporate my modifications to his guidelines.
|
When
I decided to fit Fiero seats to my ‘79 MGB I wanted to avoid drilling the
floorpan. This
is how I accomplished the task: ·
I
switched the seats so that the Fiero driver’s seat became the MGB passenger
seat and the Fiero passenger seat became the MGB driver’s seat.
This placed the seat back recliner mechanism against the transmission
tunnel which allows the seat back spring to do it’s job of raising the seat
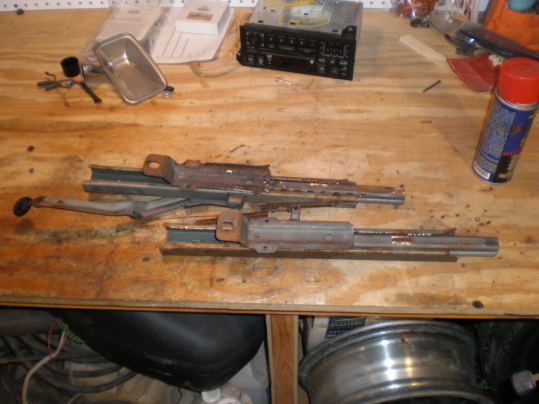
back to an upright position · I discarded the plastic shrouding since there is no room for it in this application · Next I removed the runners from the bottom of the seats · Next I removed the two rear “feet” from the seat runners and replaced them with a pair of front “feet” from a spare Fiero seat. · Before fitting these “feet” to the runners, I modified them (bent them) to the appropriate height (i.e. I bent them to match the profile of the original rear “feet”) · I refitted these modified “feet” in the correct location on the runners. This location can be easily found by using a wooden rail (found under the original MGB seat runners) as a template. The “feet” can be fastened to the runners using self-tapping automotive screws (hex-head) · The holes in the “feet”were now aligned with the captive nuts on the floor pan in a front to rear direction. However, when the runners were re-fastened to the seat base I found that the holes required enlarging in a side-to-side direction in order for the bolts to align with the captive nuts. · When bolting the seat to the floor, I used large flat washers (with a small inside diameter) on the securing bolts · I also placed spacers under the front “feet” to raise the seat slightly to provide support under my thighs. These were made from aluminum bar drilled to allow the seat bolt to pass through. · If you are using the head restraint speakers, the wiring code is as follows:
dark blue is R+ light blue is R- brown is L+ yellow is L- remember to get the connector from the donor car when you get your seats The final touch, of
course, is to fit leather seat covers from Mister.
Mike’s !
|
|