BACKGROUND:
When
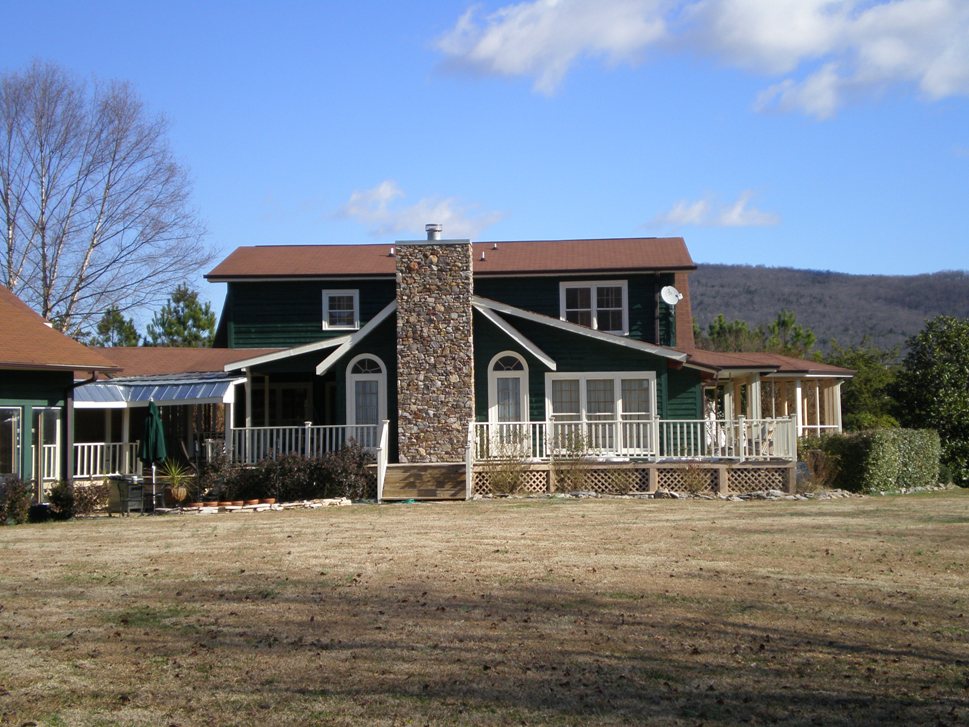
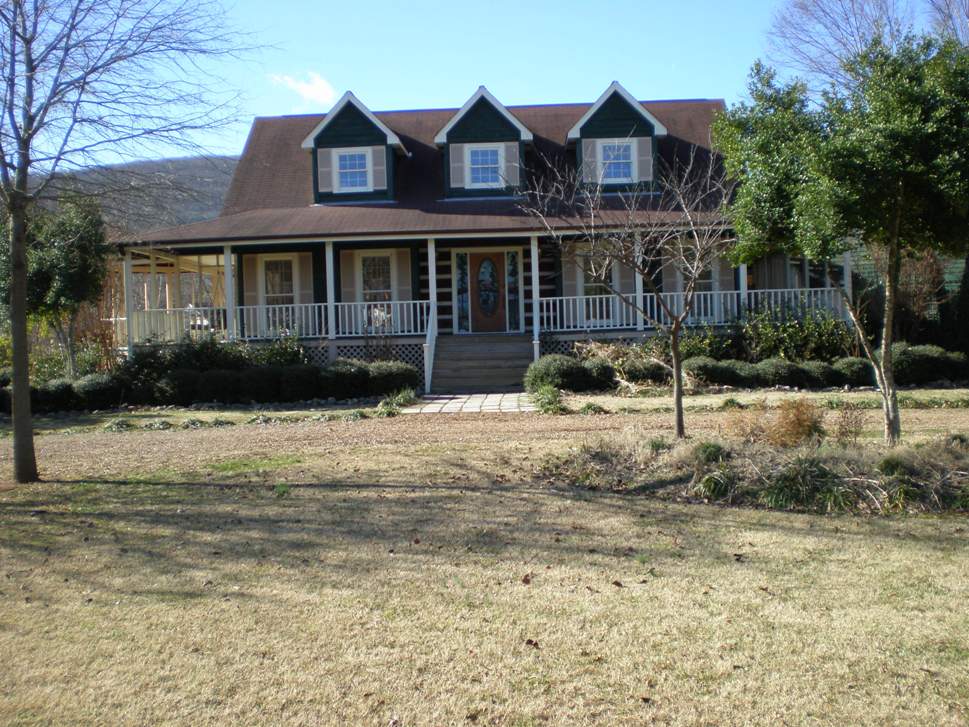
we retired from the Army in 1993, we built our retirement home outside Gurley,
Alabama where I also built my dream garage. The garage was designed with enough space for all the cars I
envisioned owning--at least, all the cars I envisioned at that particular moment
in time. Naturally, Shannon and I called it theAutoist"
garage; Jerri just called it my "Garage-mahal".
|
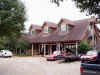
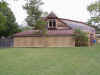
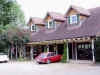
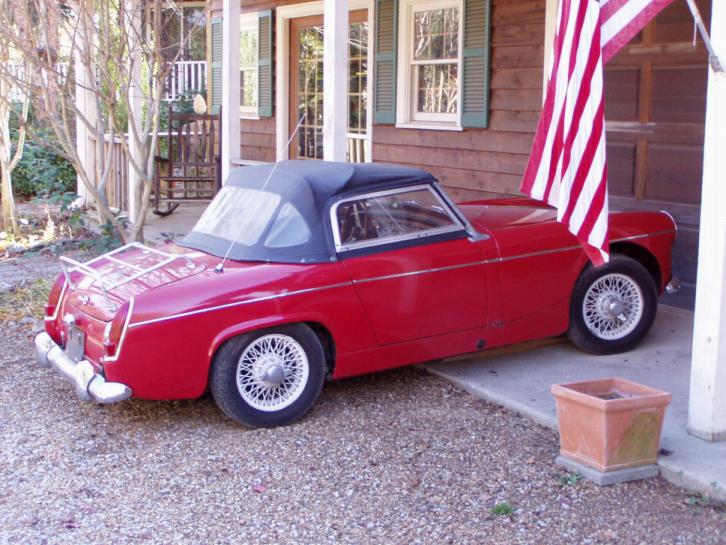
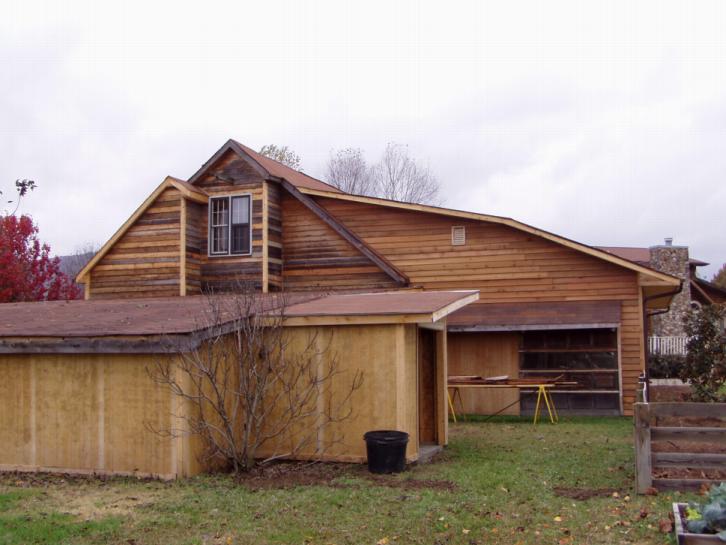
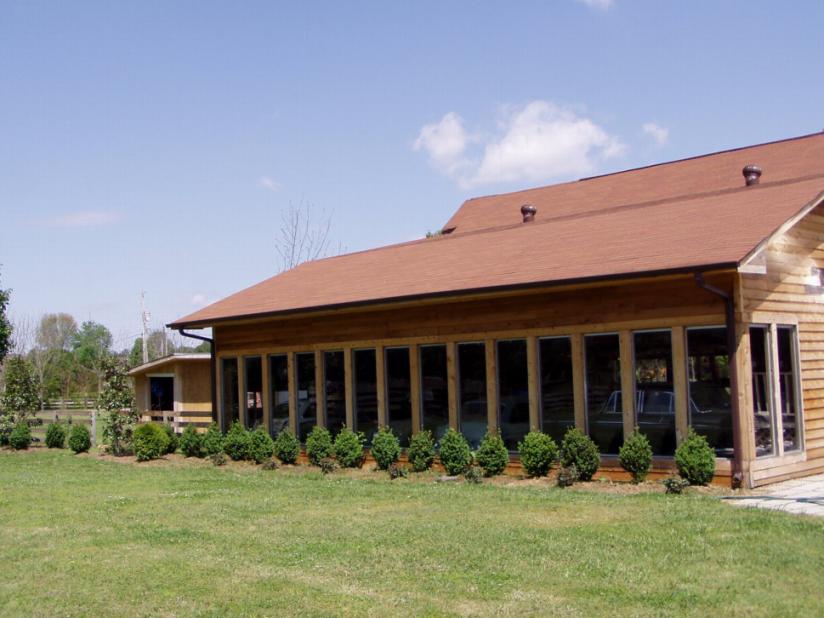
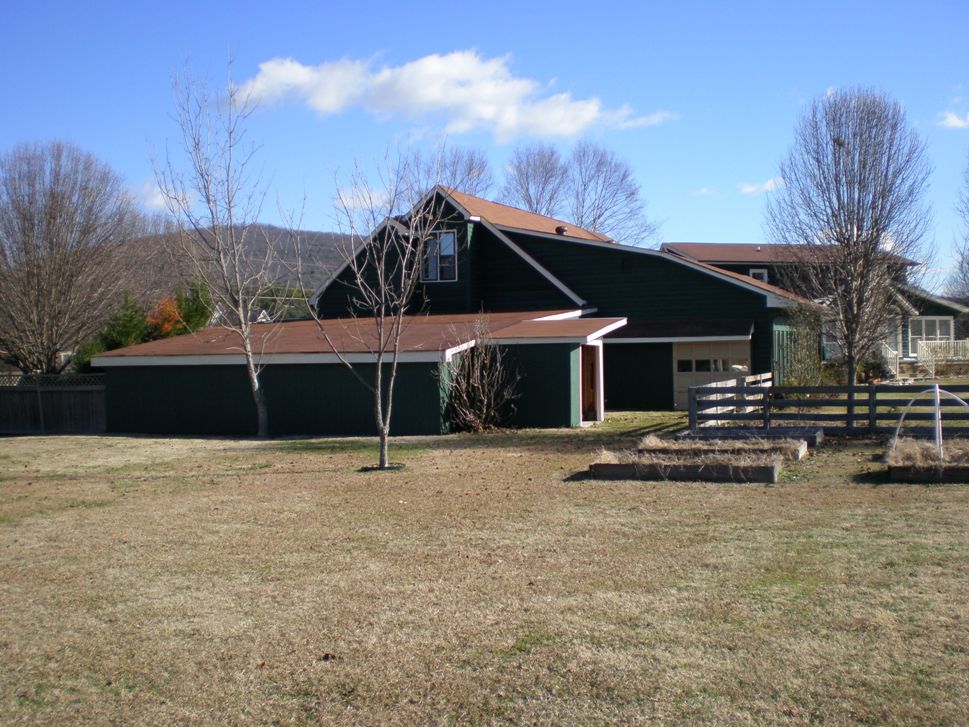
theAutoist garage
was originally a 28'x54' structure with a second story
and a full 20'x20' workshop (woodworking area, engine build
room, etc.). It has western cedar siding and looks like our
house, and has a small porch outside the workshop and a 4 foot roof
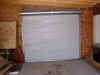
overhang in front of the 3 Clopay cedar overhead doors.
Its heated & cooled with a 3-ton heat pump.
My one concession to Jerri was a 20'x8' area behind the
workshop. It houses the stairs to the 2nd floor
and a long pantry where she stores all her food.
Jerri likes to keep lots of things on hand in case of an
emergency. She also has an extra refrigerator and
a freezer in that area. And its where we plan to
put a half bath in the future.
So, I actually had 34'x28' dedicated for car storage.
For Christmas last year, Jerri gave me a small TV and
Dish satellite setup for my workshop. For my
birthday, Shannon & her husband, Jeff, gave me a
small refrigerator. And, since then, I've bought
another, larger, flat screen TV for the garage
itself. In addition, it has a complete stereo
system to include a Pioneer receiver and Bose
speakers. Thus, Jerri's name: Garage-mahal
And, in the 10 years since I built it, it has quickly become too
small for my car collection. The main reason
it's too small is that my collection has grown
drastically. Since we built the garage, I've
developed a new goal: to own 1 of every model MG built after
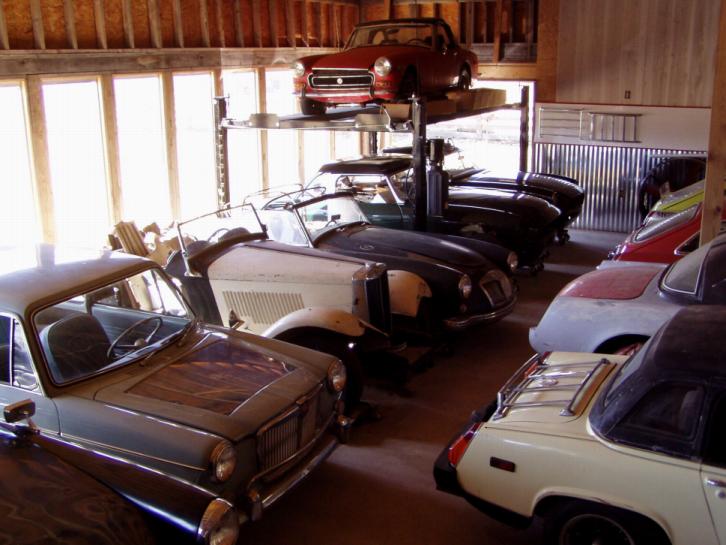
WWII (I don't know why!). Right now, there are 16 MG's
that are permanent residents.
|
|
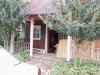
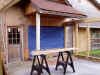
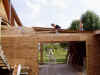
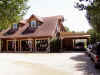
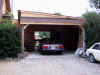
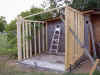
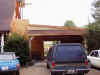
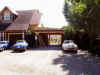
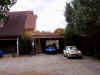
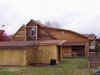
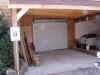
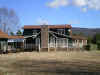
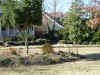
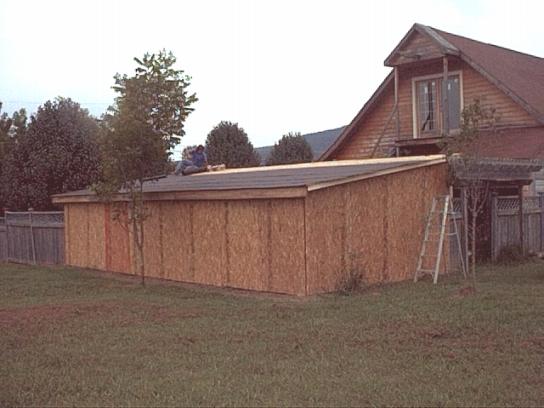
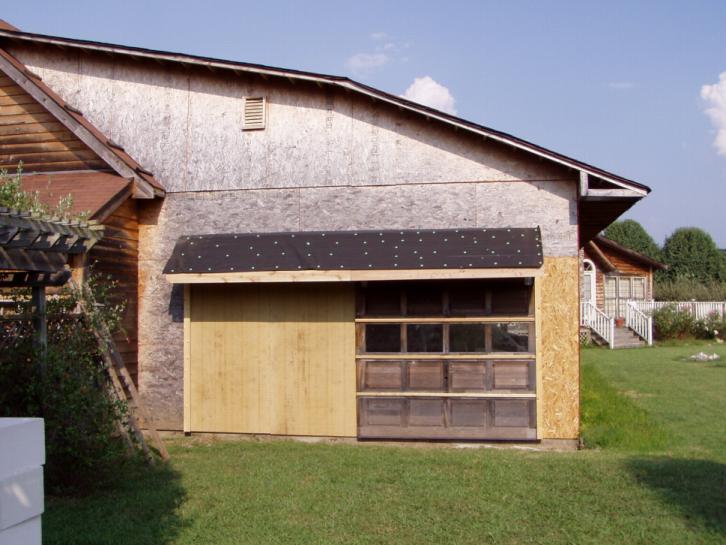
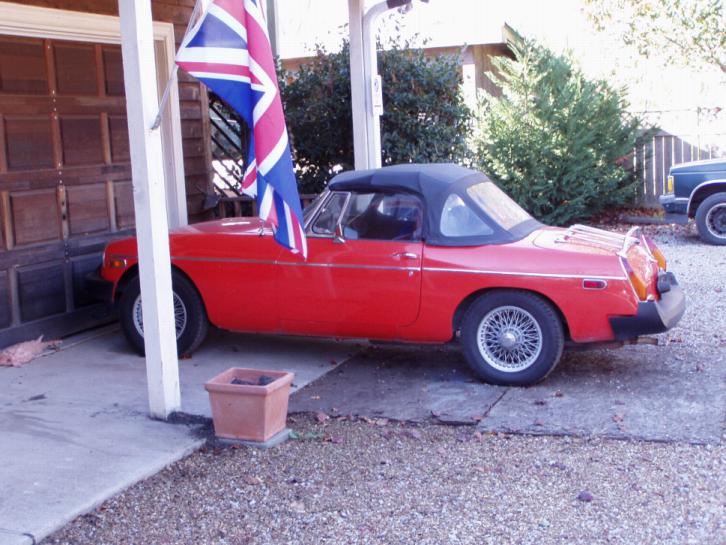
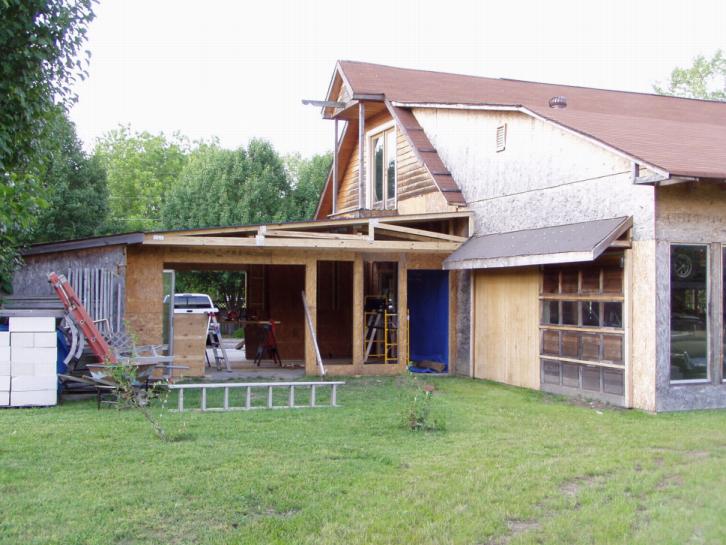
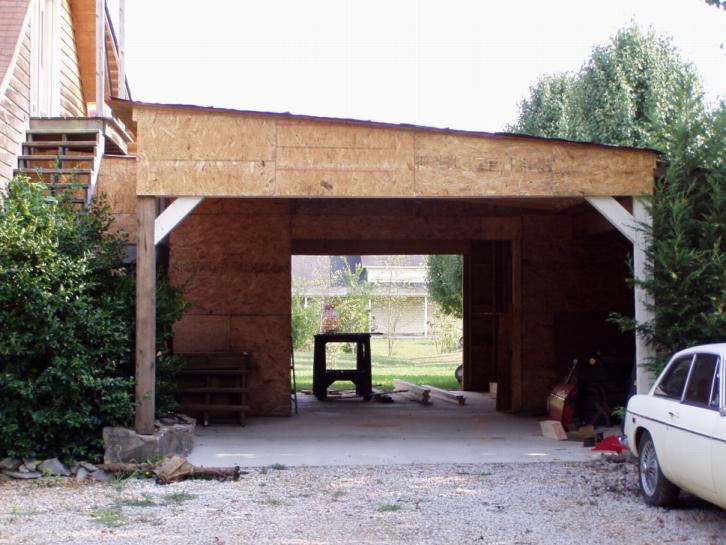
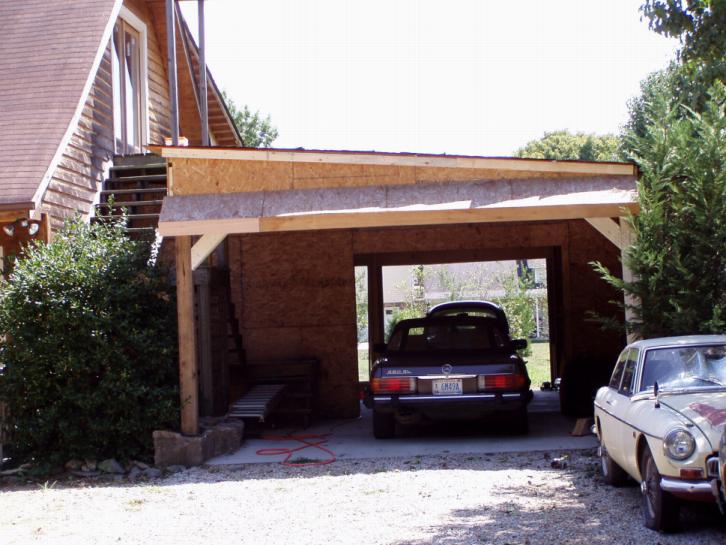
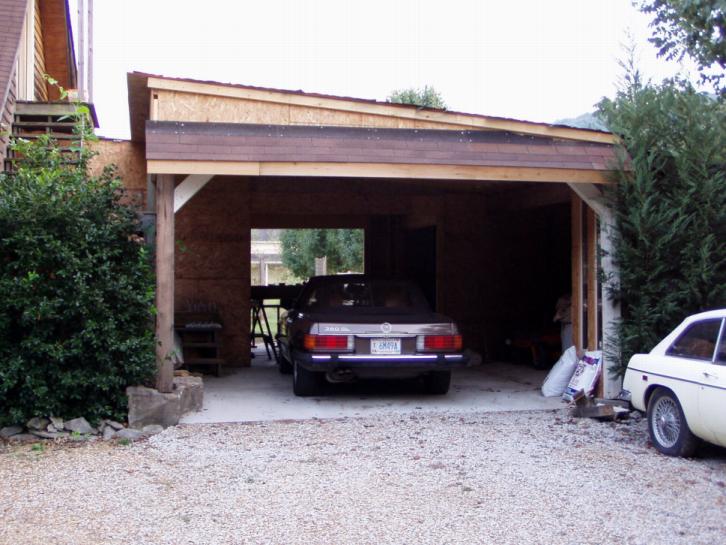
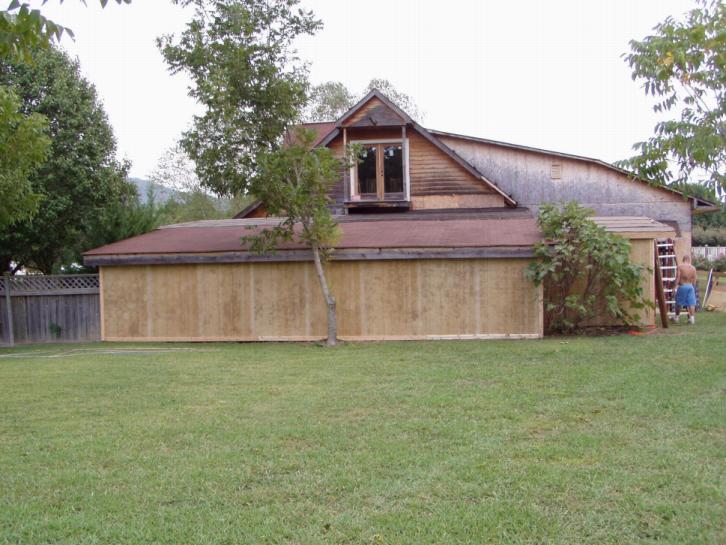
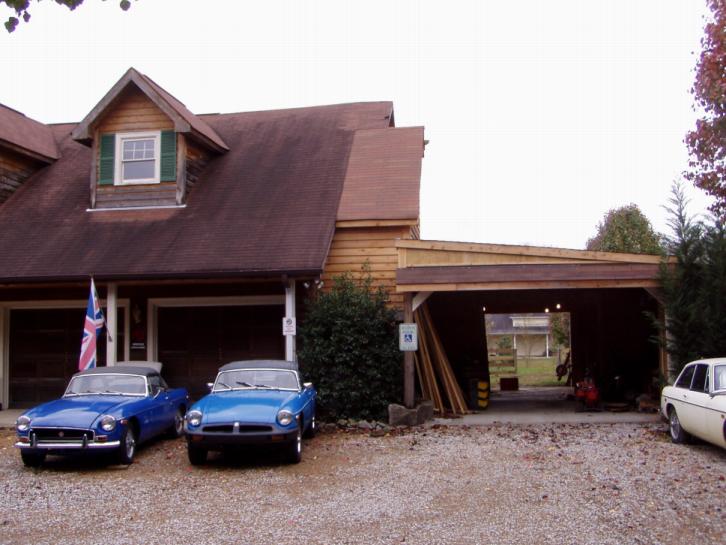
And, we also built a separate little garage (16'x32') next to the Garage-mahal
to house our odd cars:
Shannon's '71 Karmann Ghia, Jerri's '73 VW Bug, and my Mercedes
380SL. The photo to the right was taken just as we were installing the
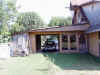
roof, before we started thinking about siding. Still, today, my 2 pickups
and Jerri's C280 still sit outside in the weather!
|
 |
THE
BUILDING PLAN:
|
I'm finishing the interior of the garage a little
differently than most garages. The bottom 4'
of the walls are corrugated steel. Above that is
2' of white peg board that I'm using as display areas
for some of my parts collection. Above that is 4'
of whitewashed paneling. That will be finished off
with a 5" crown mold tying into the ceiling that
will also be painted white. Its a slow process
that I work on as I get time. The floors will
receive some type of epoxy paint. And I'm slowly
adding my old automobile signage - along with some new
reproduction signs and my license plate collection; and,
yes, I do have an old Alaska license plate! |
|
|

|

|
|

|
|
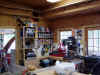
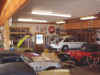
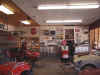
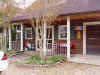
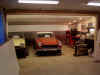
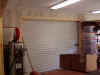
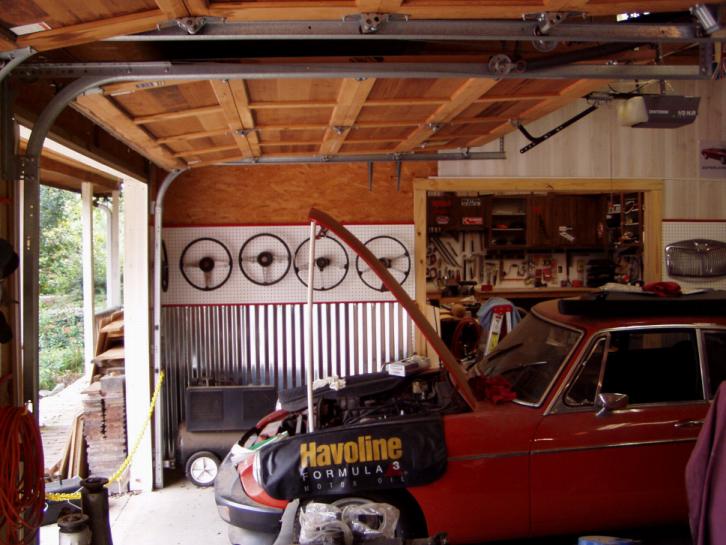
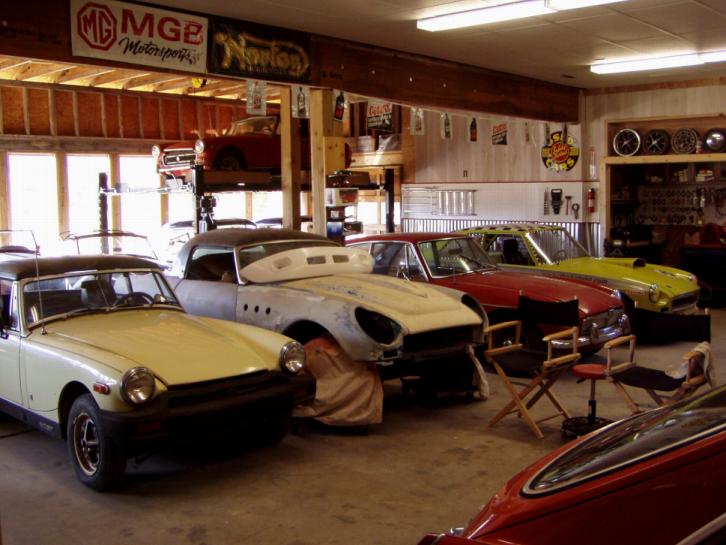
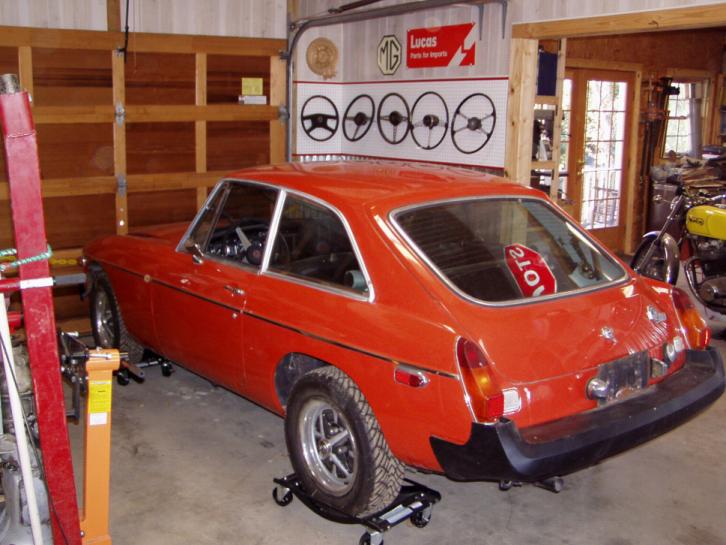
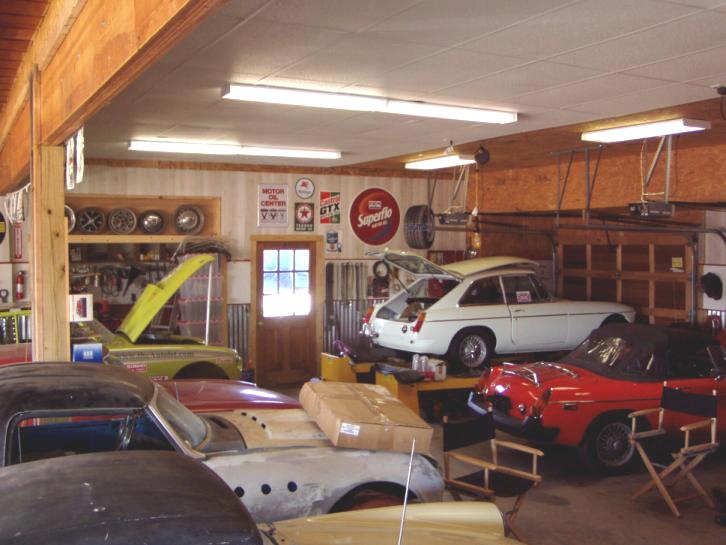
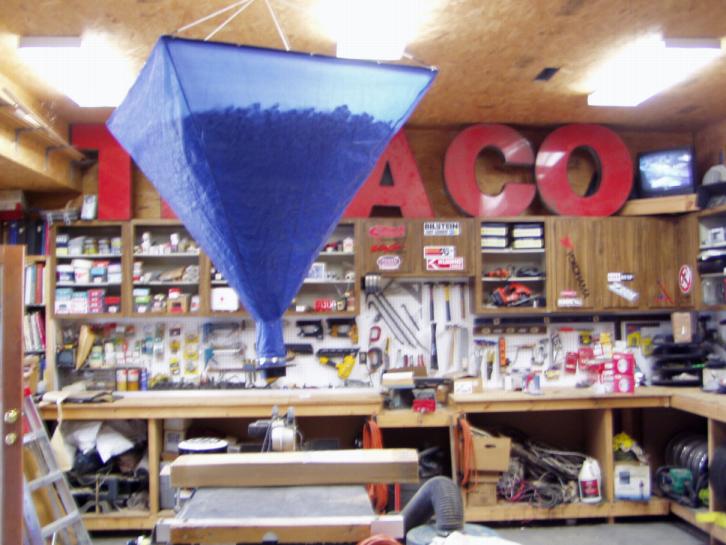
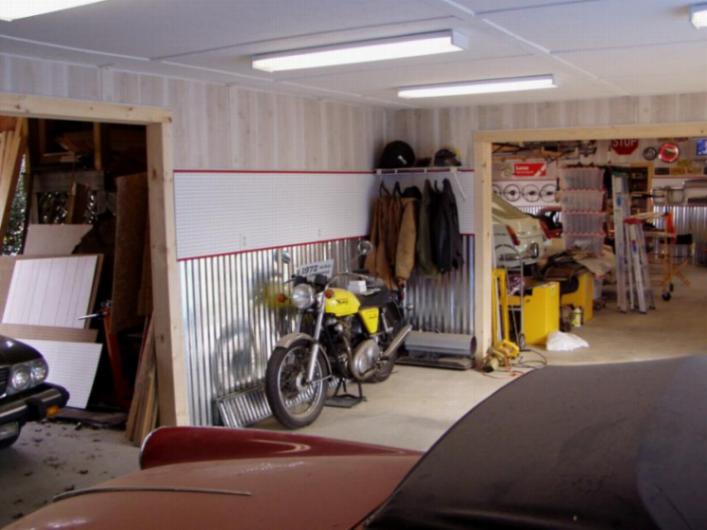
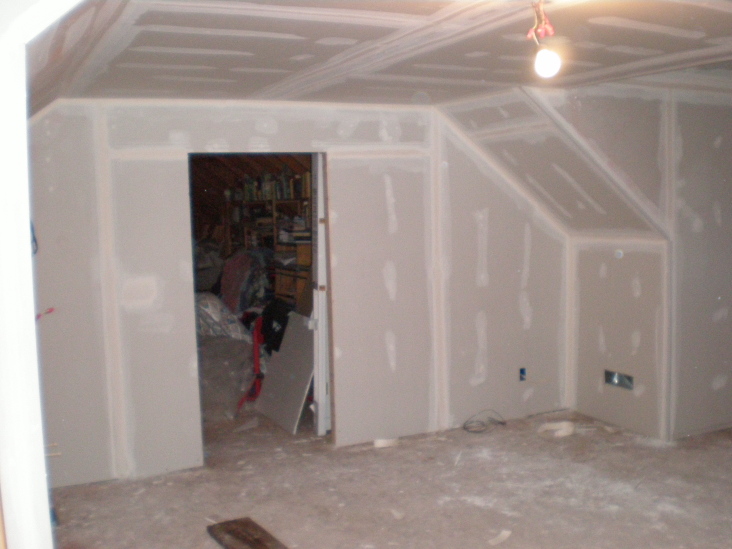
An
example of the interior
along with my MG steering wheel collection |
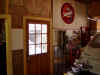
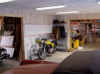
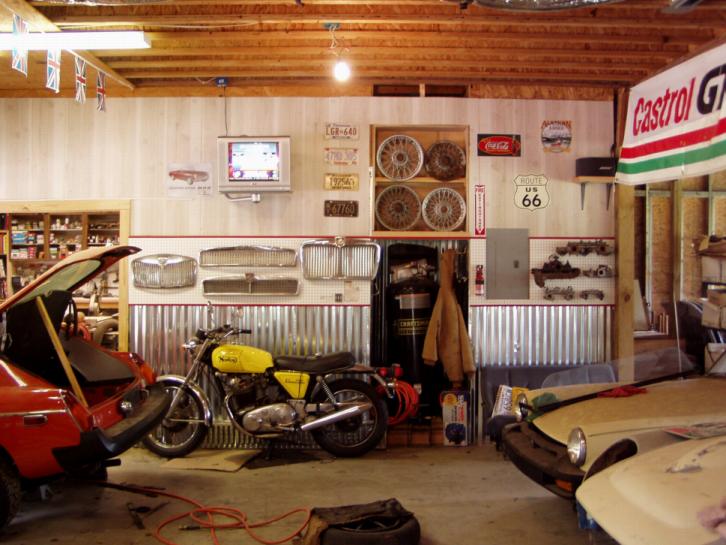
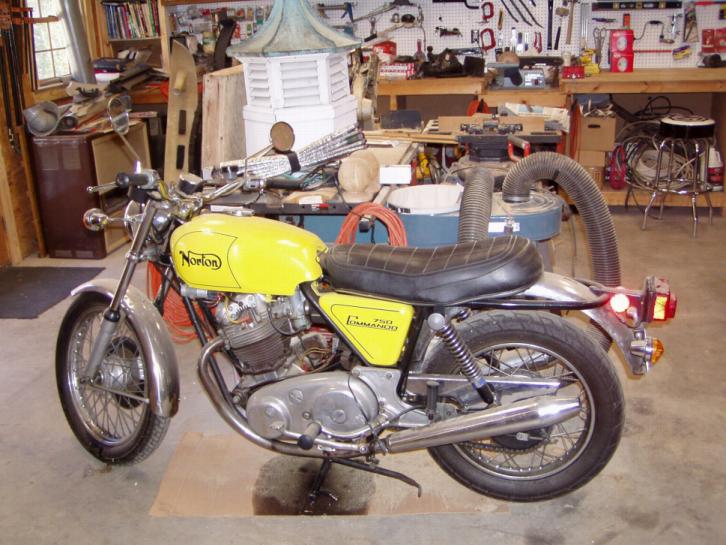
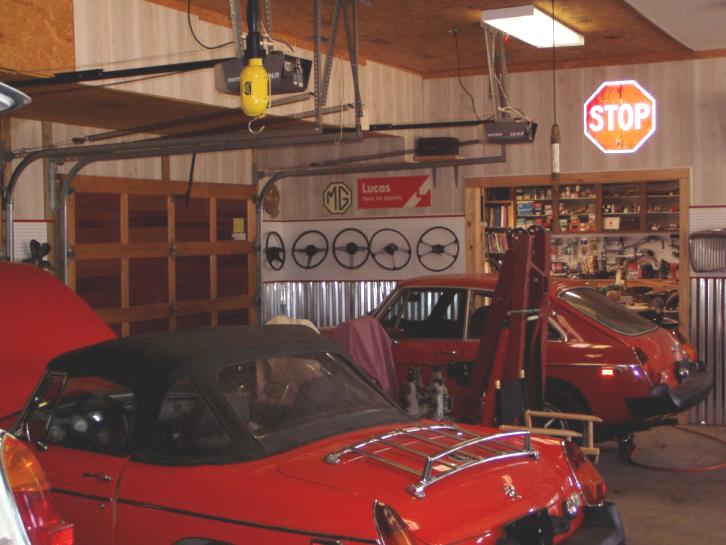
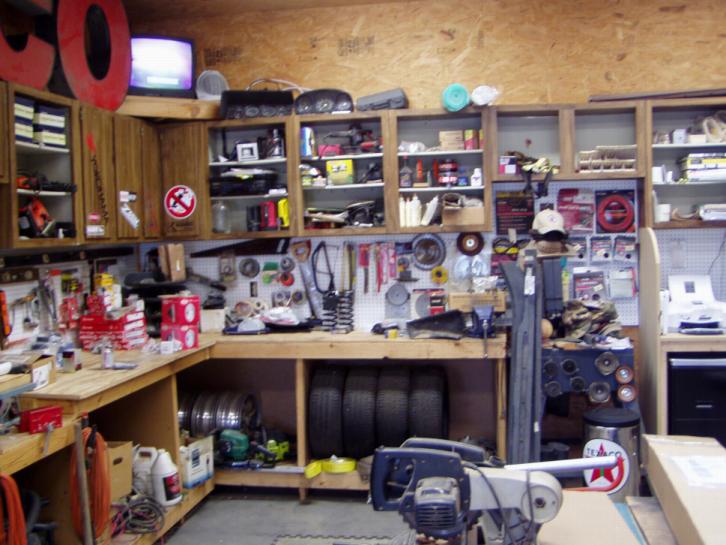
The main
wall separating the workshop from the garage & my MG
wire wheel collection. Yep, that's a Norton in front of my
stand-up air compressor! |
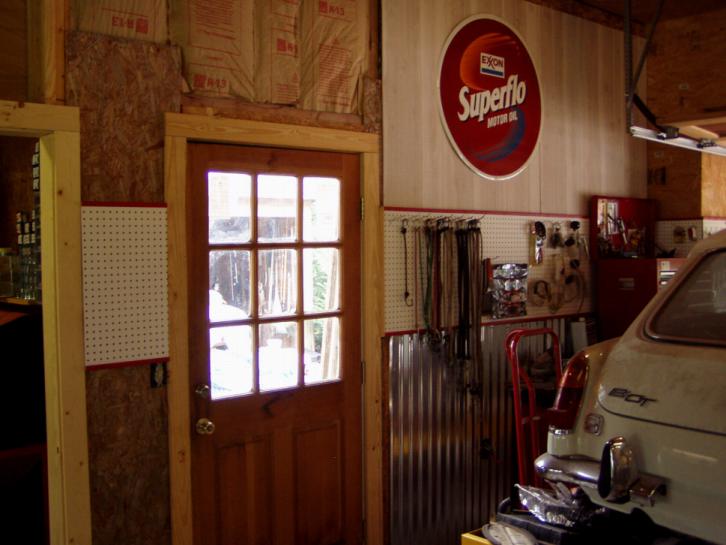
The back
wall leading outside to our smaller garage & the
outside stairs to the 2nd floor. |
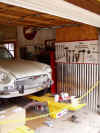
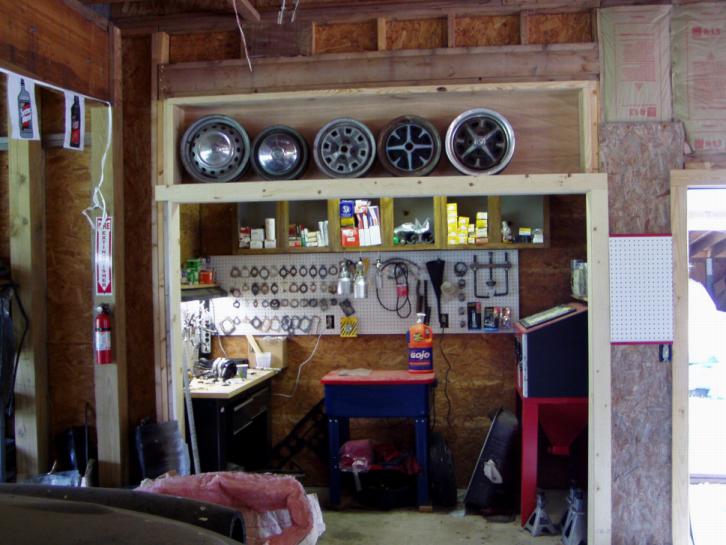
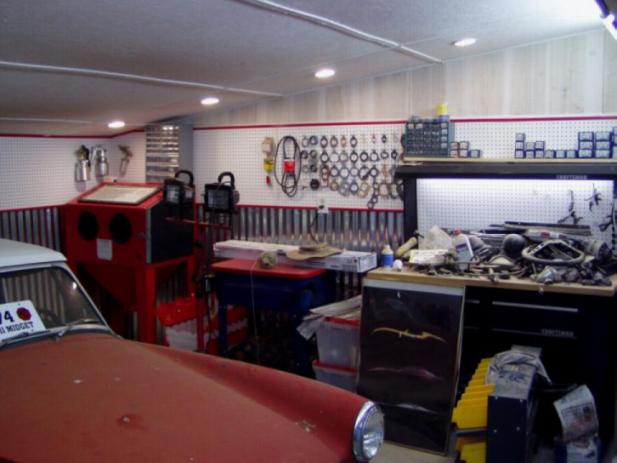
My small
cleaning/sandblasting room and MG steel wheel collection. |
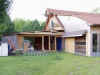
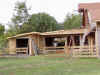
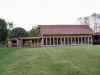
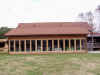
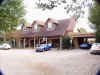
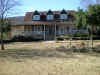
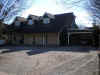
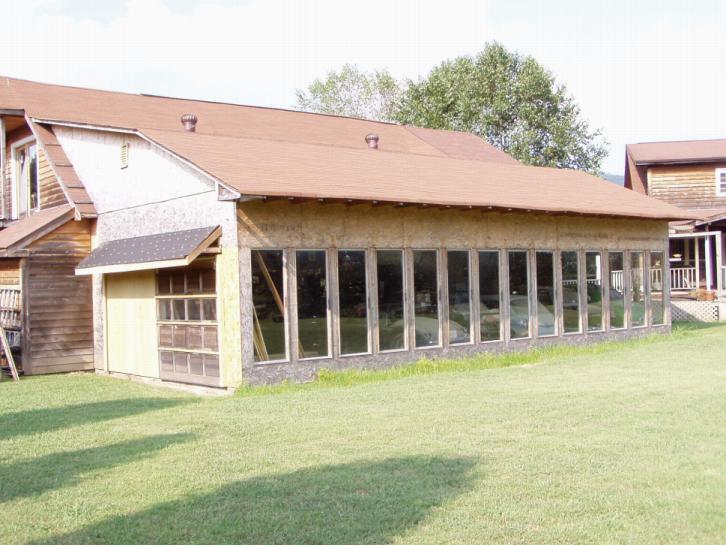
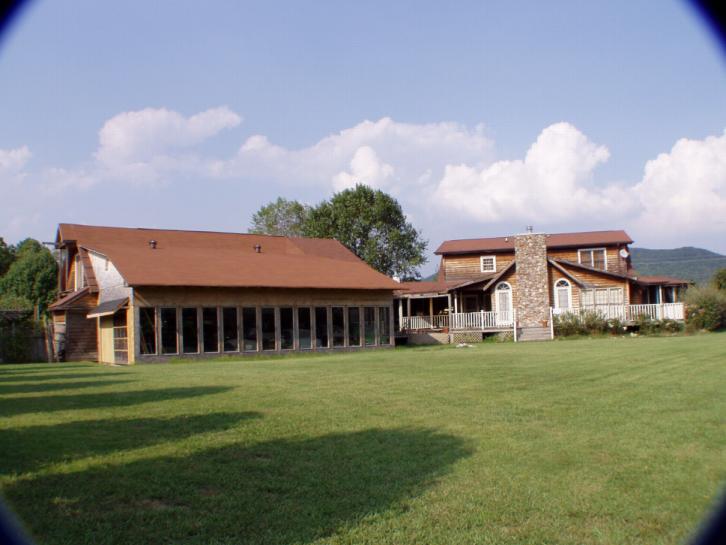
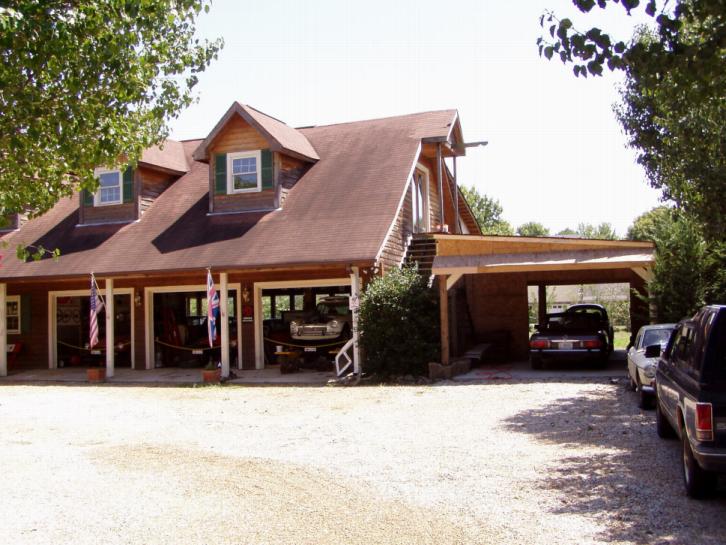
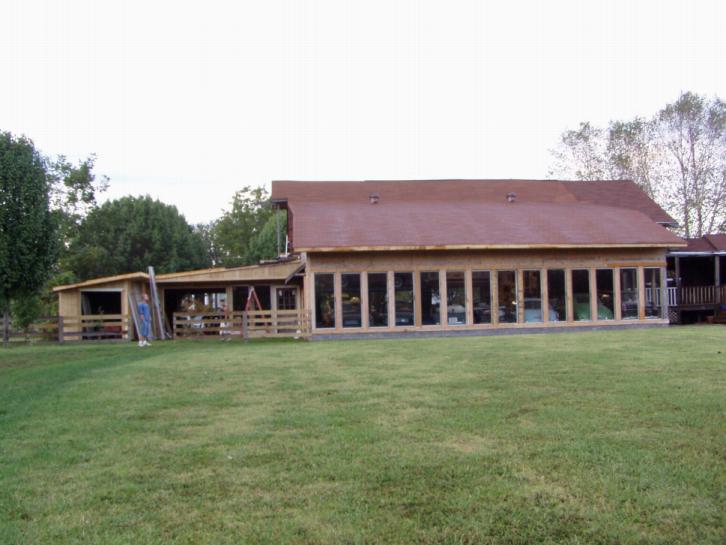
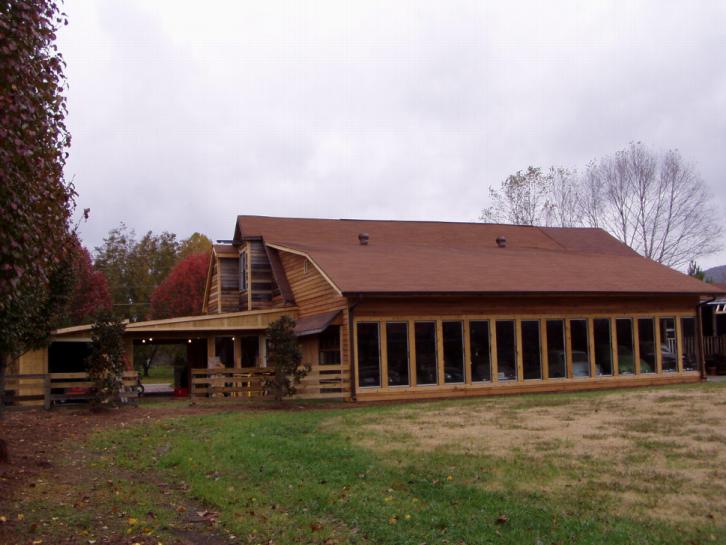
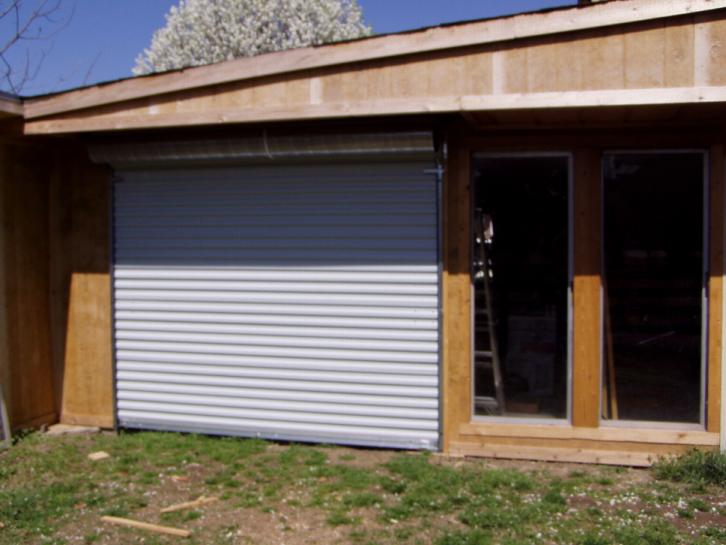
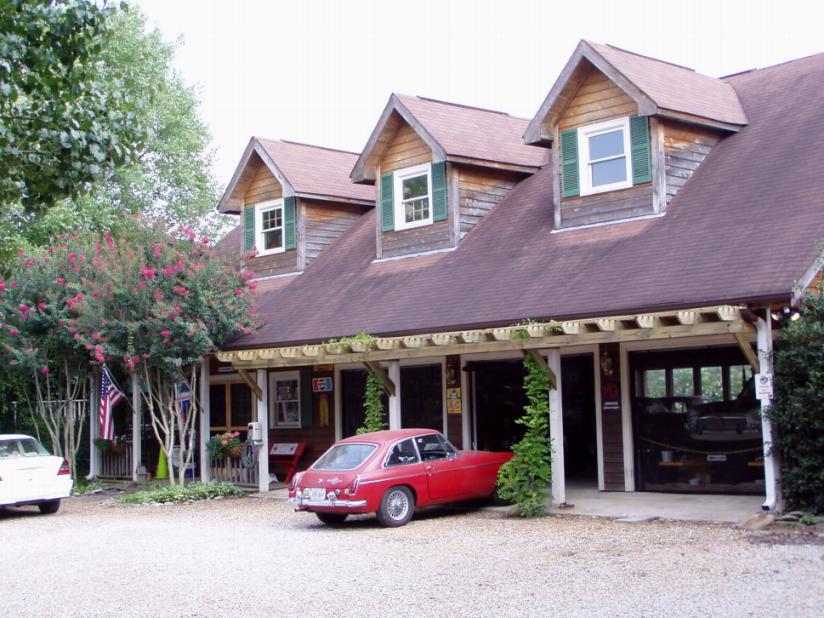
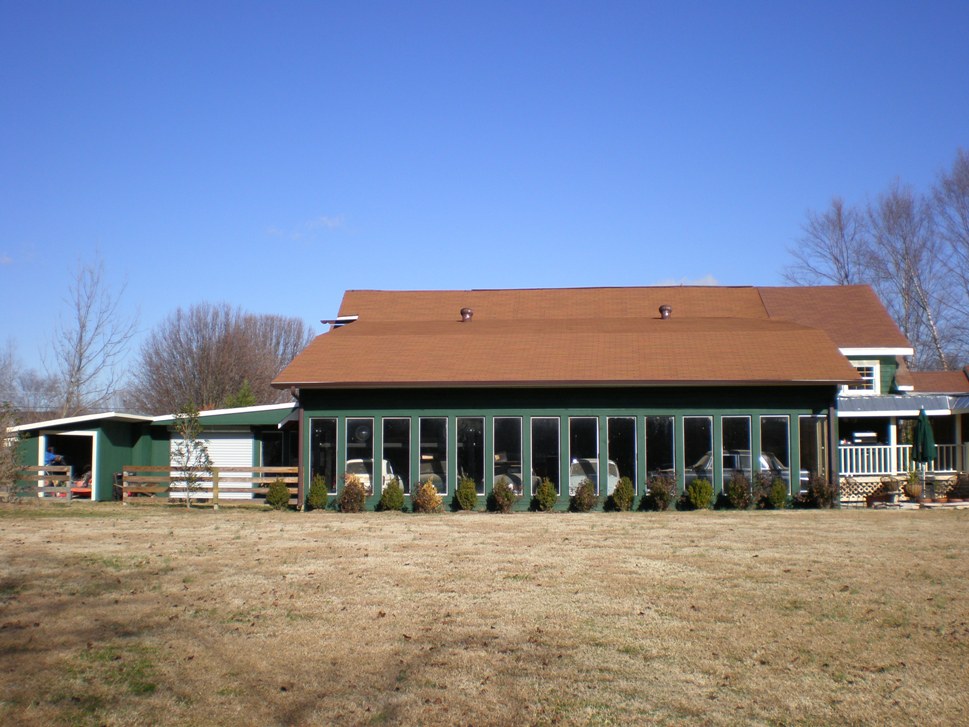
I finally convinced Jerri to allow me to add onto the Garage-mahal
(She says it looks more like a house than a garage
anyway so, why not; well, that's what I wanted: a house for my MG's!). So, we
recently began construction on a 20'x44' solid glass
addition on the rear that can't be
seen from the street. That makes the entire garage 54'x48', and space
is already at a premium!
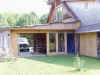
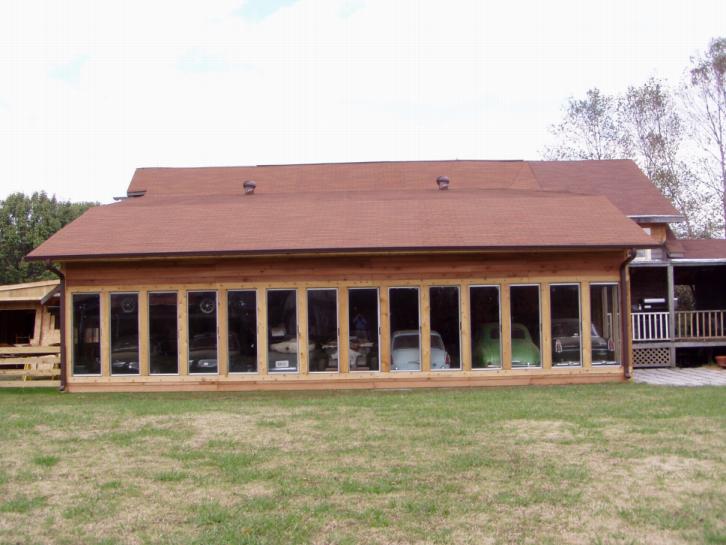
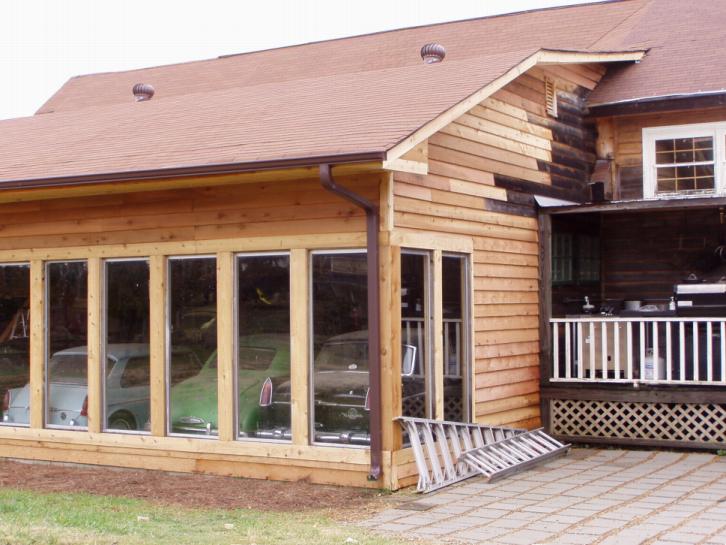
A local apartment complex was
remodeling and was replacing all its
sliding glass doors. I bought them and am using
them for windows on 2 walls of the addition. And,
while the front half (or the original structure) has a
10'4" ceiling height, the addition has an inside clear ceiling height is 12'4", plenty of
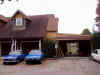
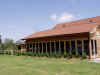
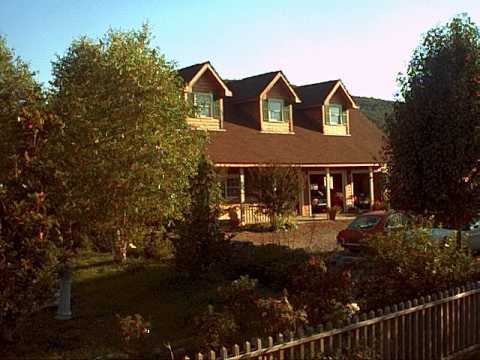
space for a 4-post lift. Here's a photo of the
rear of our house with the garage attached to it.
|

 |
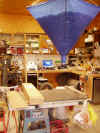
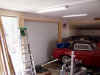
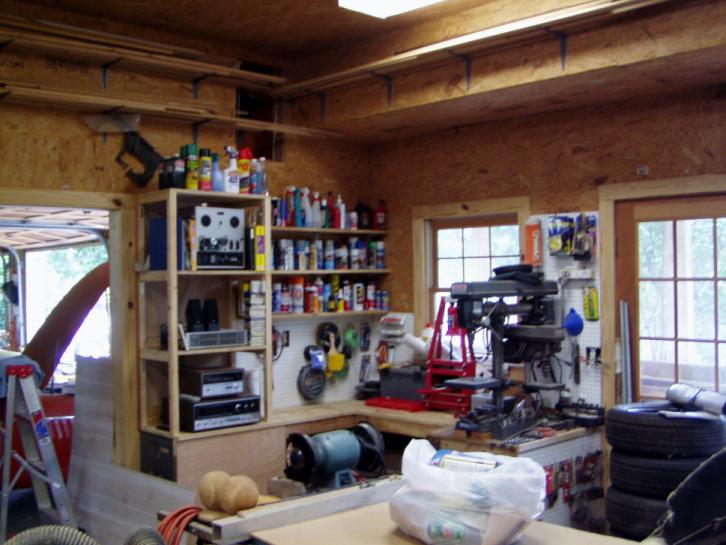
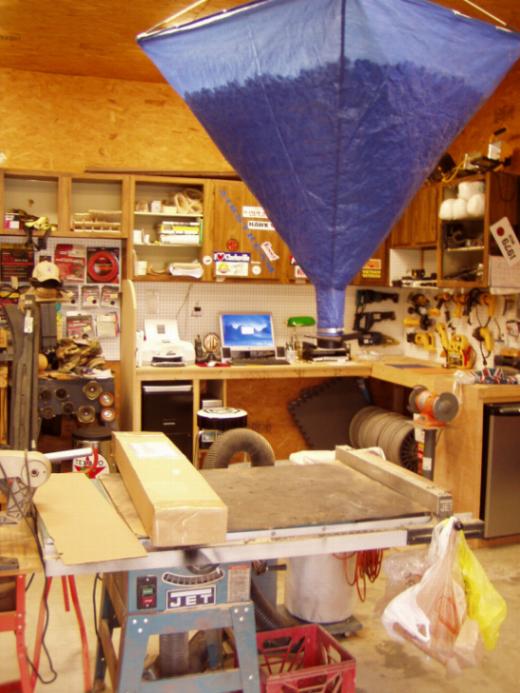
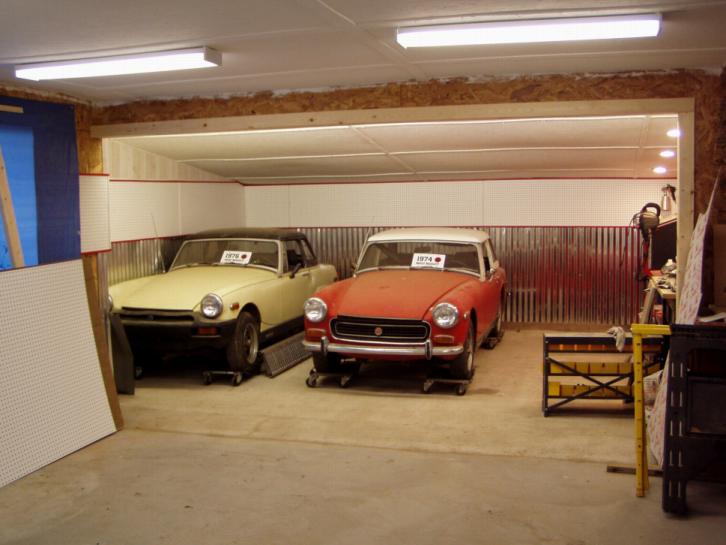
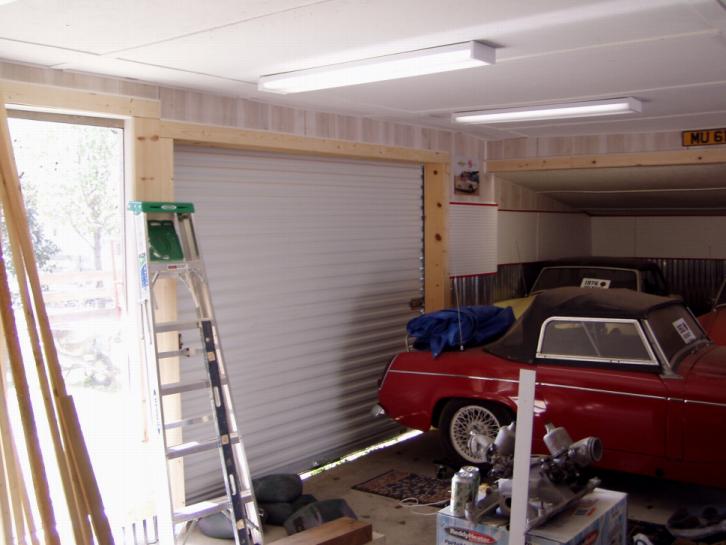
That apartment complex was also
remodeling its kitchens so I bought their old cabinets
to use in my 20'x20' workshop and in other places around the
garage (like in my sand blast/parts wash area). Under them, I built sturdy work
benches. Oh, on some of the cabinets I left the doors; on others I
removed them. In the center of the workshop I've a
large table saw that sees double duty as a heavy work
bench. And as you can barely see in the photo,
I've a dust collection system built in. |
|
|

|

|

|
|
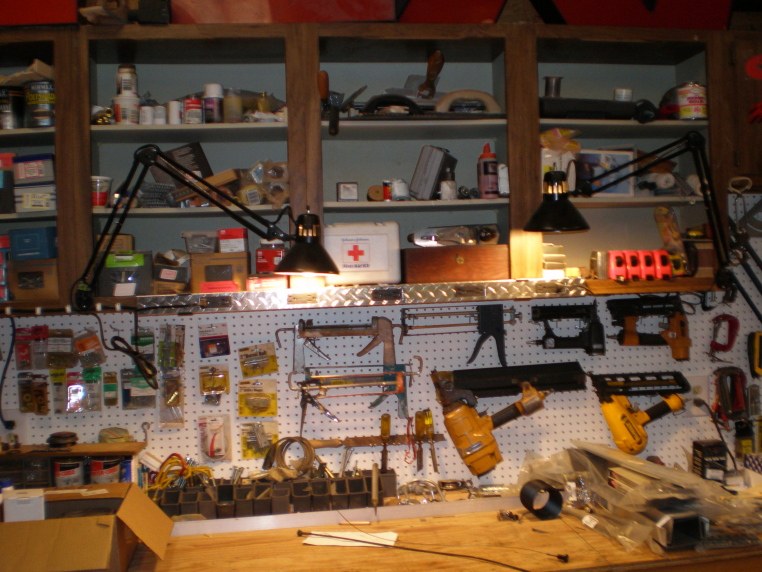
Work
shop wall holding stereo & drill press work
station. |
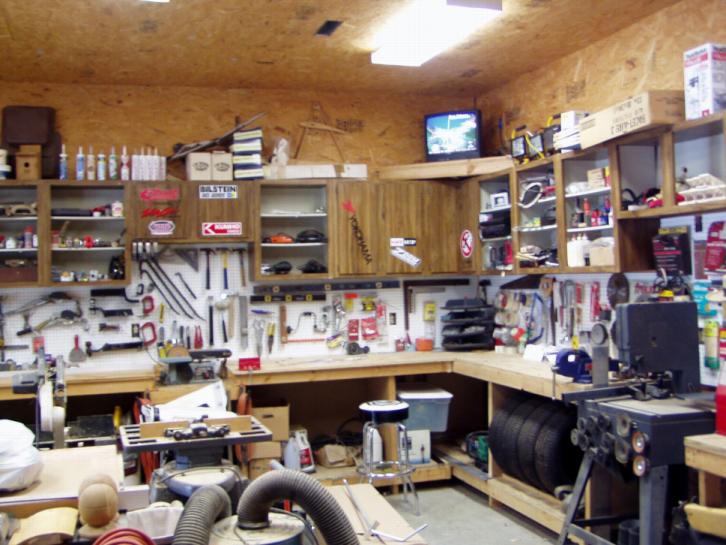
Workshop
back wall, part 1. |
Workshop
back wall, part 2. |
Work
shop wall with refrigerator & work area. |
|
|
|
|
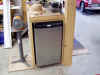
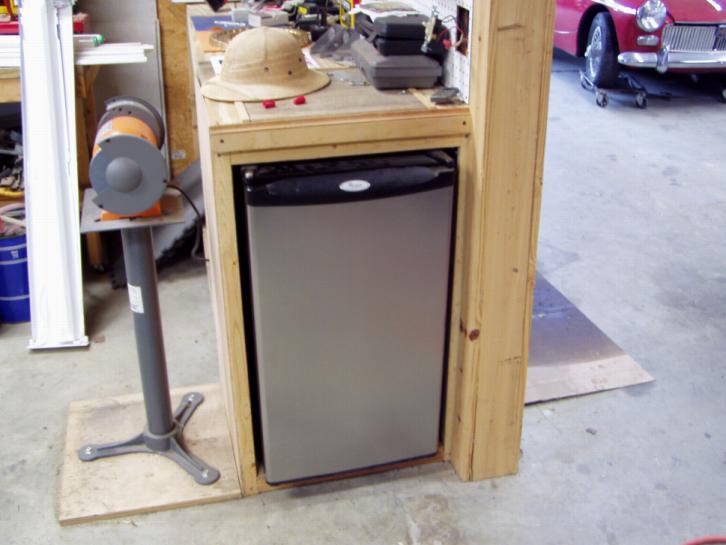
Oh,
here's a photo of my Whirlpool fridge.
Notice the built-in cutting board on top of it. |
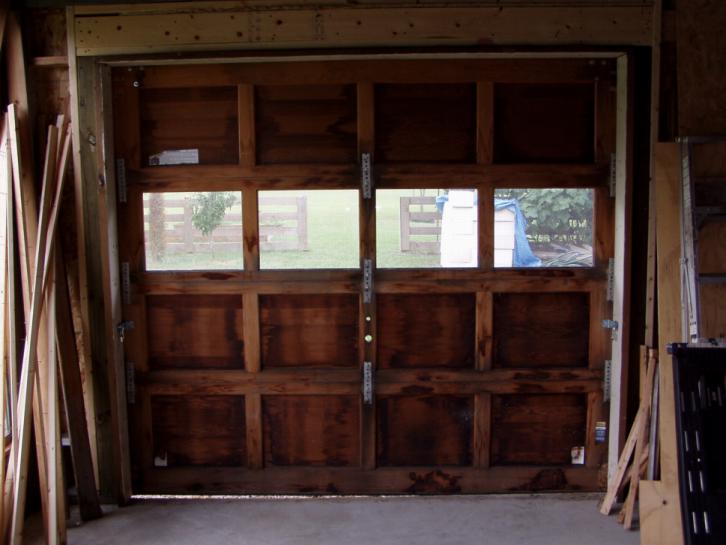
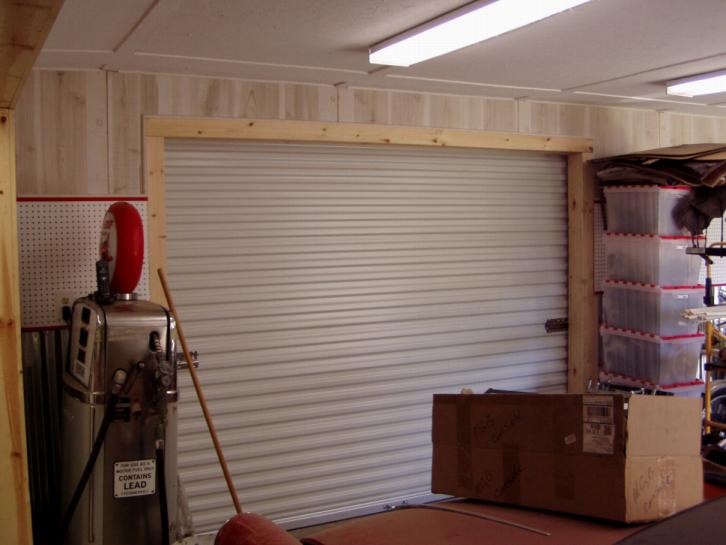
As part of the new addition, I'm also adding a 4-post lift.
To gain access to it, I've installed a sliding garage door in
one corner of the new addition. Earlier, I had
removed one of my Clopay overhead garage doors - a cedar one -
when I enclosed the small area it opened into to use as a
sandblast/tool wash area. So, I decided to turn that door
into a sliding one and use for this purpose. It was quite
easy, actually. I just bought barn door hardware and
replaced the folding hinges of the door with metal straps.
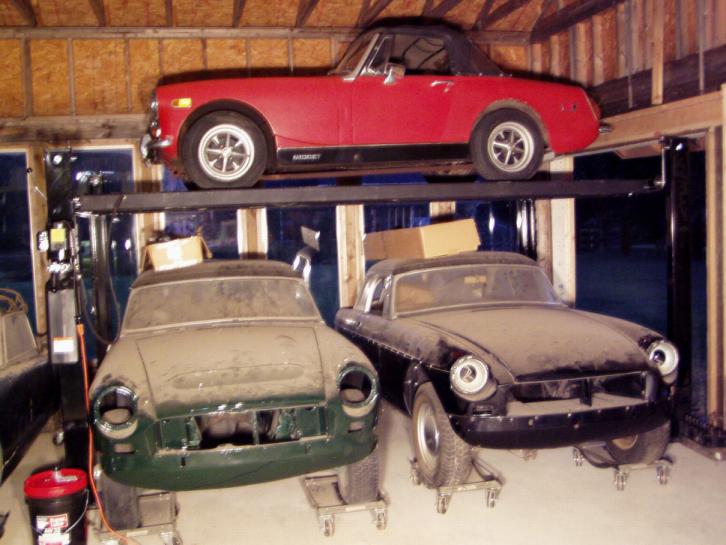
So, here's the installed lift. Its a Garage Master 7000N
I purchased through
Metro Lifts
& Equipment
in Mobile, AL
(1-888-661-5454). We had to
move the off-side ramp inwards about 5" so both Midgets and
MGB's fit.
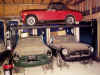
My 1974 round wheel arch Midget is on the
lift.
My 1968 MGC & 1963 MGB are under it. Both were painted
about 3 years ago & no rust has returned so they're ready
for restoration.
Over the last few days, I've been working around the garage,
finishing off the tin and paneling installation, and installing
a drop ceiling. At the
same time time, I'm also beginning the trim work. Here are
some updated photos:
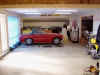
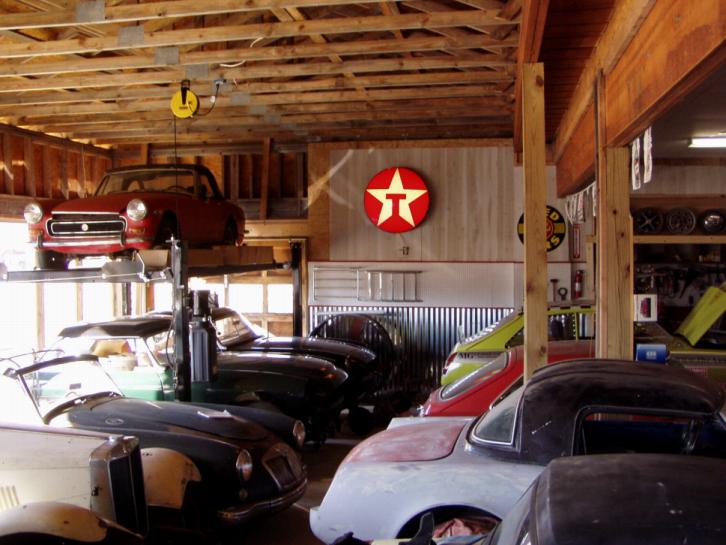
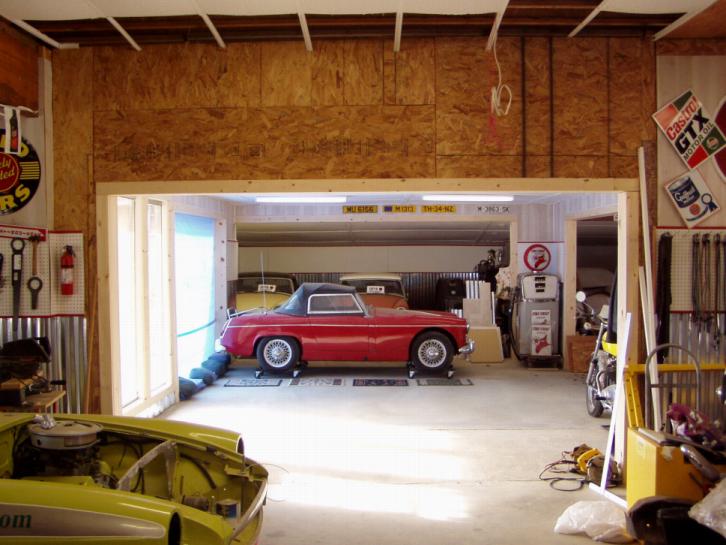
Oh, what's in my garage today?
|
|

|
|

|
|
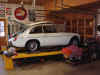
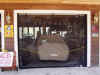
1963 MG
Midget |
1979
MGB |
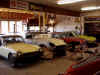
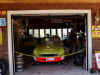
L
to R:
1956 MG Magnette
1960 Farina Magnette |
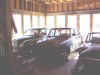
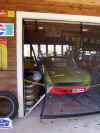
L
to R: 1963 MG1100
1953 MG TD, 1959 MGA,
1968 MGC, 1963 MGB,
1974 MG Midget (on lift) |
 |
 |
 |
 |
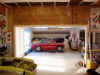
L
to R: 1976 MG Midget,
1979 MGB, 1967 MGB GT, 1968 MGB GT |
1970
MGB GT |
1974-1/2
MGB GT |
1972
Norton |
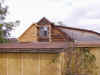
Well, work progresses and I realized I've not
kept pace here. The drop ceiling is in the front half,
paneling is going up, and lighting is coming together. Soon,
I'll crank up the 3-ton central heat pump to provide air
conditioning and heat on demand - after I insulate the back
half. But, here are some progress photos.
|

|

|
|

|
|
|
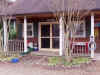
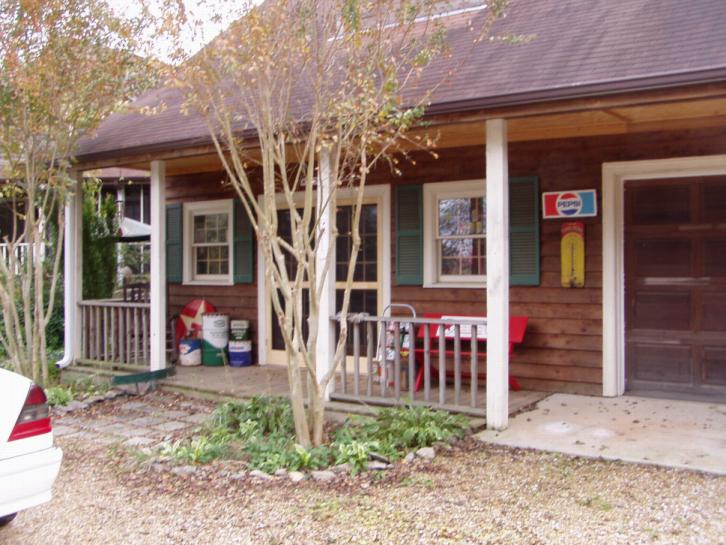
Front Porch
Here's where I'm going for the old gas station theme. |
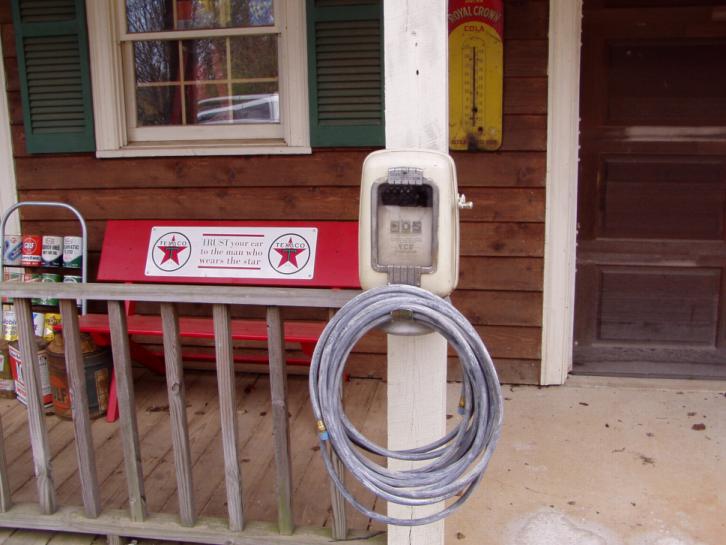
How do ya
like that lighted Texaco sign? |
|
|
Dropped
ceiling & permanent lights in front half of
garage. The section that is wood will be painted
white. |
Oh, did you see my winter
restoration project in the last photo? A 1958 A. O. Smith
gas pump!
PHASE IV: Yesterday, we poured the slab for the next
phase of construction. Initially, we built a 28x54
garage. Then we built a smaller 18x32 shed off to one end of
the garage. Next, we added a 20x44 glassed showroom onto the
rear of the original structure. This 16x32 slab bridges the
area between the smaller garage 'shed' and the main structure.
|
|
The slab
consists of 2 different areas; the back half is smooth and
will be enclosed to make our new "Midget
Room". The front half is brushed and will be an
open-air pad where I can either work on cars or store my
trailer. There's a 3' down-turn incorporated into
the slab with a smoothed edge so it blends into the slab. |
|
|
The small
'bumped out' section will be demolished and will be the
main entry into the new addition. Inside it has a 9'
opening that will remain. Also, the door will be
removed and turned into a cased opening. The bottom
3 steps to the second floor of the original garage will be
turned around so the wall can be extended outward where
the support post stands. Once the 'bumped out'
section is removed, the new area to be enclosed will be
21' wide plus the 18' of the small shed garage and 16'
deep with 9' overhead garage doors in the front and rear
wall |
Let the destruction begin!
11
May 2006:
Gotta
put a date here to keep things straight.
Since we took the first photo of the new slab, we're gotten
pretty far in the build. The front and rear walls
connecting the large garage with the little garage shed are
finished.
|
|
To
accommodate the front wall, we had to redo the stairs
leading to the second floor. That front wall has an
opening for a 9' overhead door. It also separates
the small garage shed into two sections: one that will be
inside the garage itself and one that opens onto the
covered outside pad to hold my lawnmowers and yard
equipment. |
|

|
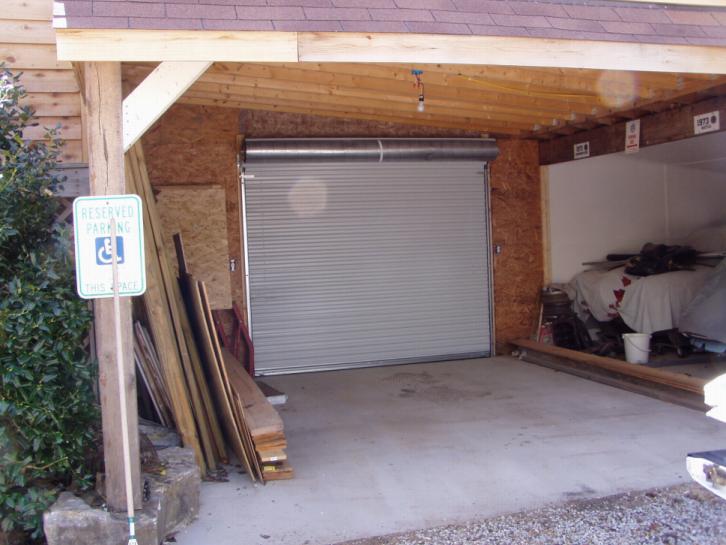
The rear wall also has an opening for an overhead door
opposite the one in the front wall along with an opening
for a 3' door. It also has openings for a couple of
the sliding door "windows" used across the rear
of the main garage. |
|
|
And, except for the roof, the small 'bumped out' section
of the garage where my parts washer and and blaster were
located is now gone. We'll remove the roof when
we've decided how to frame the new addition's roof. |
Next is the roof. We'll extend the roof of the
little shed garage up and out to the garage itself, covering the
addition. The trusses arrive next week.
Before they can be erected, we have to remove the old roof that
extends out from the original garage and build a fake wall
alongside the original garage wall to support them.
Demolition
of the final part of the existing garage to be removed is finished! The
new "Midget Room" s ready for its roof. We
went...
And my custom-built trusses arrived today; so, after I lay out
the roof plan, we start setting them in place.

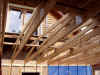
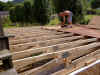
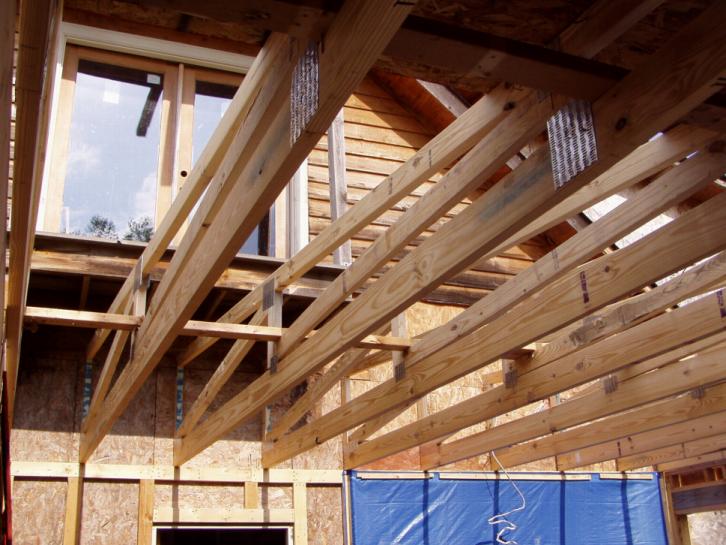
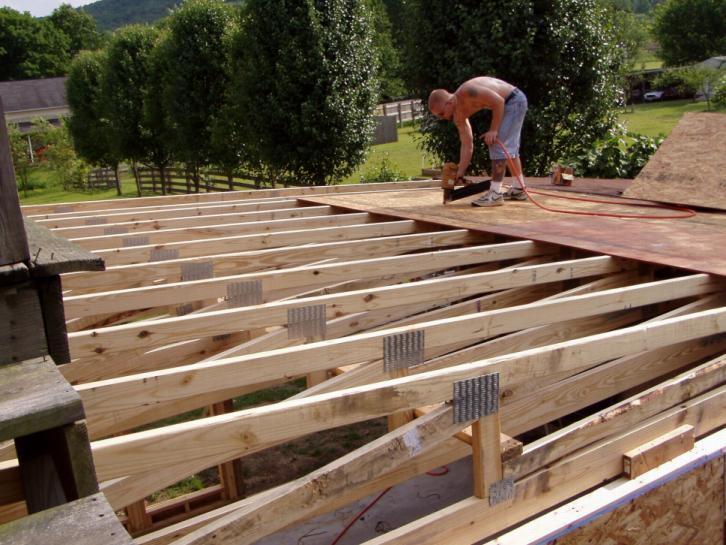
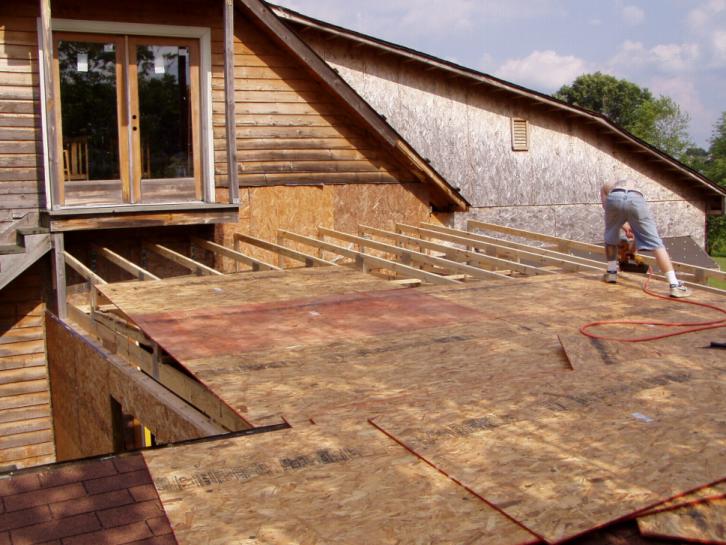
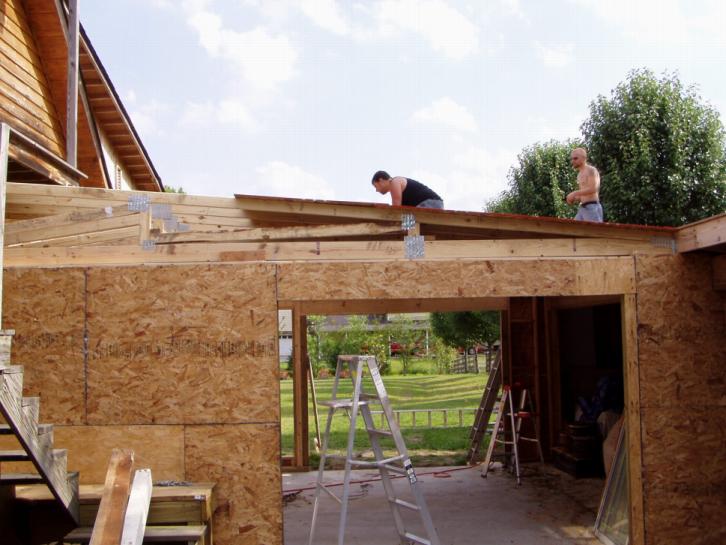
We have a roof! One good, long Saturday:
|
|
|

|
|
|
Looking
up through the trusses |
Laying
the strand board |
Almost
here! |
Finished! |
|
|
|
|
Front |
Rear |
Now that the trusses and strand board are up, its rolling out
the felt in preparation for shingles, building overhangs, facia
and sofit in the rear, and extending the front roof to cover the
outside work area. Plus, the gables have to be
closed in.
WHEW!
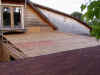
|
|
Well, this is
where she'll languish for the next month: black paper is
on the roof, windows are installed, and the rear gable is
ready for trim work. When I next work on the
project, I'll focus on cornice work on this gable/wall,
getting it ready for overhead door and small people door.
Then, I'll turn my
attention to building the front carport area. |
15
July 2006: Now
that I'm back in town, things are progressing slowly. The
back wall is ready for trim and cedar siding and the rafters are
up for the front open carport section. The front wall of the
addition is also ready for its siding; but, I've not yet figured
out what I want to use there..
|

|
 |
|
Front |
Rear |
24
July 2006: The roof decking on the front carport/outside
work area along with its black
paper is finished and now I'm working on the finish work for the
front facia.
|
|
|
|
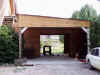
Here's
the carport/outside work area with its
rafters, decking,& black paper... |
...and
this is what it looks like with
the header & OSB sheathing installed. |
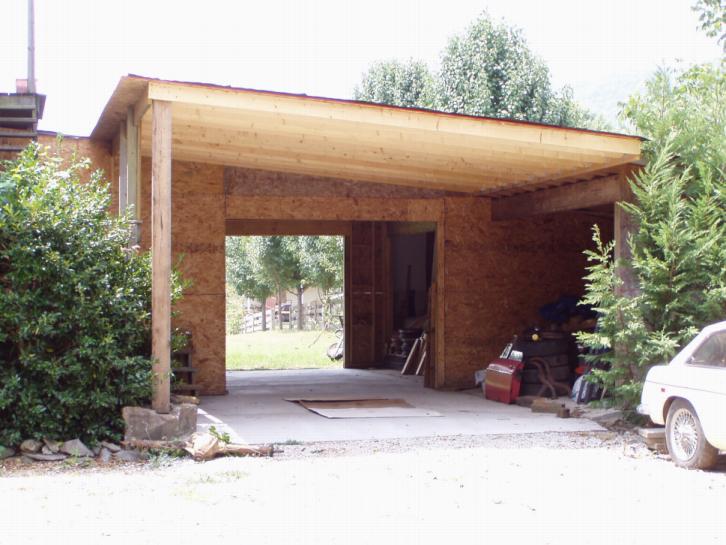
5
August 2006:
|
|
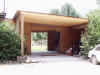
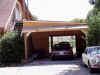
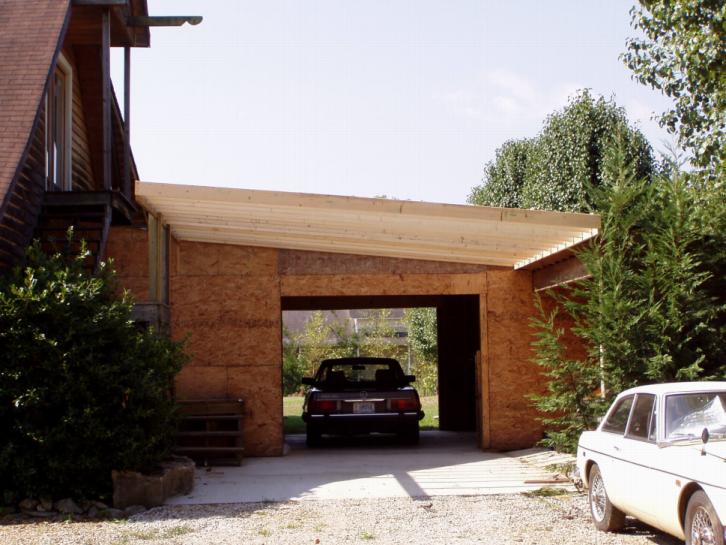
I've added a small overhang to the front of the carport
over the opening to provide some protection from blowing
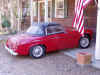
rain. I checked and my Mercedes 380SL fits underneath perfectly
with room to spare where the overhead door of the Midget Room will
be, and with
plenty of room on both sides to open both its doors.
When we start
finishing
the inside of the Midget Room and carport will be figuring out a beam system for an overhead engine
hoist in the carport.
|
|
|
I also did
some measuring and found that I can extend the main garage
roof
and enclose the stairs to the second story landing.
That will entail building a knee wall at the front edge of
the landing in the photo to the left, extending the second
floor landing sofit out about 3 feet, and building a gable
wall sitting on the header beam for the carport. Its gonna
be a little tricky tying it all together; but, I'm really
excited about that project! |
9
September 2006: It may not seem
like I've done much lately; however, everything's been going on
behind the scenes. We redid some fencing in the rear of
the garage to open up an area so I can drive straight through
the new addition to get to my side overhead door.
|
|
The front of
the carport area is taking shape with shingles on the
overhang and the beginning of facia and soffit work. |
|
|
Out back, I'm
framing up a small lean-to shed as storage for my
lawnmower and associated tools. That'll free up an
area inside the new addition for my 3 German cars. I
couldn't start this little project until I removed a 20'
Bradford Pear tree and moved the fencing around. |
23
September 2006: Unfortunately,
I neglected to take any photos as I finished the little lawnmower
shed; however, its complete and ready for siding. I also
moved some of the fencing that separates our lawn from Jerri's
raised bed garden, orchard, and grape arbors (as well as my MG
parts storage buildings). That new fence allows me to bring
cars straight through the new "Midget Room" to the side
door of the main building where the 4-post lift is
located.
Then, this last week, was
spent installing the facia and soffit of the main showroom garage
as well as OSB between all the tall windows.
After that was finished, we switched back to the new construction
area (lawnmower shed & Midget Room) and tackled the soffit,
facia, and siding. For this new part of the Garage-Mahal, we
decided to use a different siding that would complement the cedar
siding on the main building while breaking it up. We found a
barn siding that comes in 4x8 sheets and installed it. Then,
all corners, facia, and edging was done in rough cedar like the
main building.
A little side bar: The lawnmower shed was built around my
favorite fig tree. The tree came from one that's been
growing in Mississippi at one of my elderly aunt's home for well
over a hundred years. Confederate soldiers picked figs from
it during periods of rest between battles. One day when I
was visiting her, I mentioned how much I had enjoyed those figs as
a youngster - man, they are sweet. Well, she grabbed a
garden tool and whacked a shoot out of the ground. I've
placed it in several locations around my property but where it is
now is the only place it liked enough to grow and bear
fruit. Hopefully, the shed will provide additional
protection to ensure it continues to flourish. (I know, you
didn't care - but I do!)
|
|
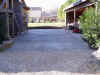
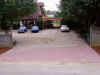
We also
tackled the driveway out front. I say
"driveway" but its really just a 12' x 16' pad
in front of our privacy fence that transitions our gravel
parking area to the street. I really like the large
gravel parking area in front of the Garage-Mahal, but I
didn't like how the gravel was always migrating out into
the street. So, we laid a pad of brick pavers from
the street to the fence around our parking area.
Next, we'll plant some evergreen shrubbery on either side
of the pad. |
28
September 2003:
The front of my outside work area is finished, the front wall of
the stair enclosure is ready for rafters, and the back of the
showroom is coming along. Today we added the Western Cedar
around the windows in preparation for the cedar siding.
|
|
|
|
The wall
between the new addition
and the original garage is where
we're extending the roofline to
enclose the stairs to the
2nd floor. |
You want
windows?
I've got windows!
Western rough cut cedar is
being installed as frames around them. |
30
September 2006:
|
|
WHEW!
Today we got the stair enclosure finished. That was
fun, matching the 10/12 pitch of the original roof.
Now its time to lay the shingles since all the new
construction is complete. |
7
October 2006:
We've spent the last week putting shingles on the roof (except for
the stair enclosure), and we've finished the cornice work on the
new construction. We also added a window to the 2nd floor
stair landing. All the cedar is around the showroom windows
and the seamless 46' gutter along the rear of the main garage is
finished. 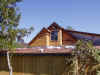
Plus, we've started on the rough electric work in the Midget room;
ceiling light boxes are installed along with some of the wall
outlet boxes.
13
October 2006:
|
|
Shingles are
on; only trimming them is left. Now, we're finishing
the soffits on the new addition and starting the cedar
siding installation. The plan is for the garage to
look finished from the road by the end of the weekend. |
And we're continuing on rough electric work inside at the same
time. Plus, we'll be building a couple of temporary walls so
we can remove the wall between the original structure and the
Midget Room. To do that, we have to build a new header
capable of supporting the end of the original garage and the
trusses of the addition.
22
October 2006:
The siding is almost finished all around the outside and we're
moving inside. Here are updated exterior photos"
|
|
|
|
|
|
|
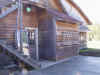
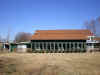
Rear of
the main "showroom" with its cedar siding. |
New 2nd
floor stair enclosure getting aged cedar siding so it
matches original. |
Front of
addition is finished. |
The front
of my workshop is beginning to take on a country gas
station look. |
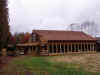
Front of
garage except for the shed hidden by cedar trees. |
Inside, we've finished the rough electric and started installation
of the hard insulation on the Midget Room along with strand board
ceiling and wall coverings; and we've cut a huge 14' opening
through the wall between the new Midget Room and the original
garage.
25
October 2006:
|

|
My newest toy
for the GarageMahal: an old Tireflator!
We're gonna paint it
Texaco green and, in the Spring, run a hard air line to it
so its operable! Neat, huh? |
8
November 2006:
Finally! Except for staining, the exterior of the
GarageMahal is finished! We're now working on the interior
of the addition plus I've been working in the "command
center" which is now equipped with a computer linked to the
internet, copy/fax machine, and telephone.
|
|

|

|

|
|
theAutoist
Shipping & Receiving |
Workshop |
Workshop |
Workshop |
|
|
|
|
|

|
|
Entrance
to
Workshop |
New
Addition
Carport |
New
Addition
Small Shed & Stair Enclosure |
Rear of
Garage |
Corner
Where Garage
Connects to Breezeway |
Ain't she purty?
Landscaping is going in, we're working on Jerri's outside kitchen
that's on the breezeway, and generally turning our focus to the interior.
2
January 2007:
As I said: interior! The back half of the "Midget
Room" is finished and occupied (there's still some
straightening up needed). The bottom half of the walls are
corrugated tin, and the upper part is white peg board with
paneling overhead.
|

|
|

|
|
Tain't
they pretty?
Both little Midgets have their factory hardtops in place.
And I can walk around them! |
This view
gives an angle on the work area with my work bench, parts
cleaner, and sand blast cabinet.
There's actually room! |
Close up
of my work area
(yes, I know the bench is cluttered. But now I can
finally get to it to straighten up!) |
Now we turn to the interior of the "center room" that
will house my '53 Midget, my '53 TD, and my motorcycle.
4
January 2007:
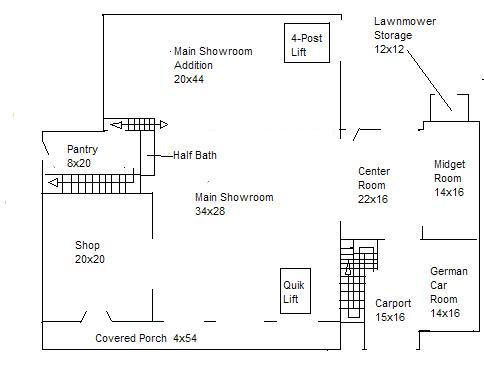
Here's a sketch (not to scale) of the footprint of the GarageMahal:
14
January 2007:
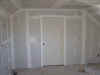
Finally! The interior of the 'Midget Room' and 'Center Room'
complete. All that's left is for the roll-up doors to be
installed and the trim painted. Painting the trim will come when the weather turns warmer. The roll-up doors are
ordered and will be installed when they arrive.
|
|
|

|
|
|
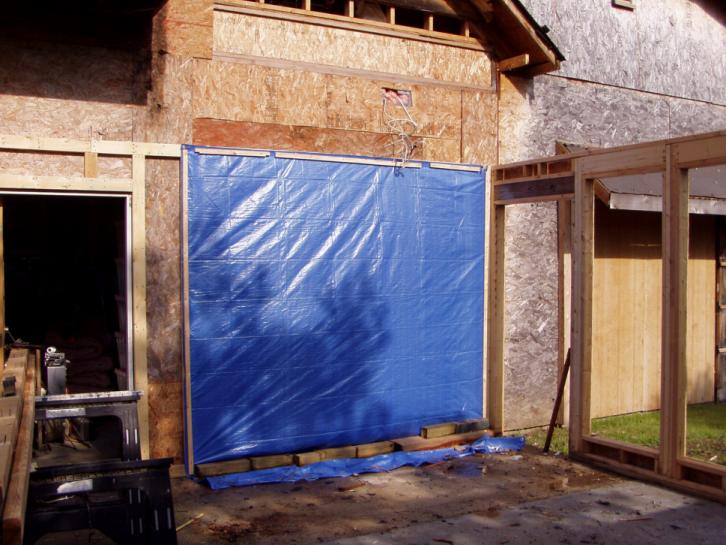
Looking
into the 'Center Room'
with the 'midget Room' behind.
The blue tarp on the left and large opening on the right
are where the roll-up doors go. |
Motorcycle
storage area in the
'Center Room'. The large opening on the left is
there a roll-up door goes to separate the 'Center Room'
from the 'German Room'. |
Rear wall
of the 'Center Room' with its large windows opening to the
South., the small door opening to the back yard, and the
blue tarp where a roll-up door will go. |
Looking
into the 'Center Room' from the 'Main Showroom' shows the
wall we opened to build the addition and the dropped
ceiling we have to redo. |
17
March 2007: It
seems as though its been a long time since I've gotten anything
done; and it has. I was out of town the entire month of
February so work came to a halt. During that lull, however,
my roll-up doors were made and delivered. Yesterday, we got
them installed. Lemme tell you, roll-up doors are easy to
install! Now we can lock the garage and set the alarm.
|
|
|
|

|
|
|
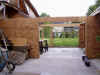
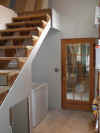
The front
door under the carport from the carport side. |
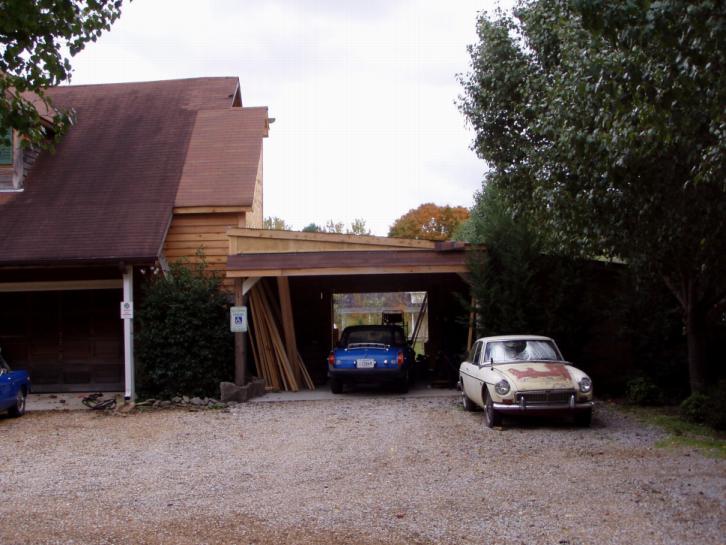
View of
that door from outside the carport. German car
parking is to the right in the little shed. |
Inside of
the front door. The off-white color really matches
the paneling. |
The rear
door from the outside. That 2' overhang will protect
it from the elements. |
Inside
view of the rear door. There's construction stuff
stacked everywhere right now! |
Because I chose to put the doors on the outside of the garage so
the huge roll wouldn't take up ceiling space inside, I now have to
go back and pour a 4" wide concrete lip at the rear
door. I may just concrete the entire 20-or-so-foot square
area around the rear of the new roll-up door and the sliding door
to my 4-post lift; less grass to cut that way!
Now I've got to clean up after all the construction and put away
the lot of parts I recently purchased from a garage that went out
of business. Man, there's stuff stacked everywhere.
Seems no matter how big this garage gets, there's still stuff
everywhere!. 28
April 2007:. I
hate leaves! Especially when they blow through my open
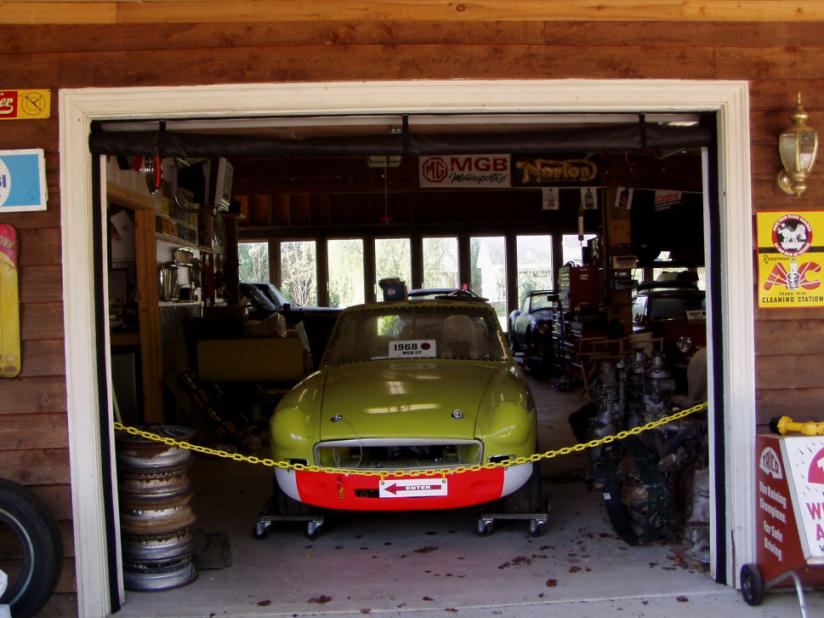
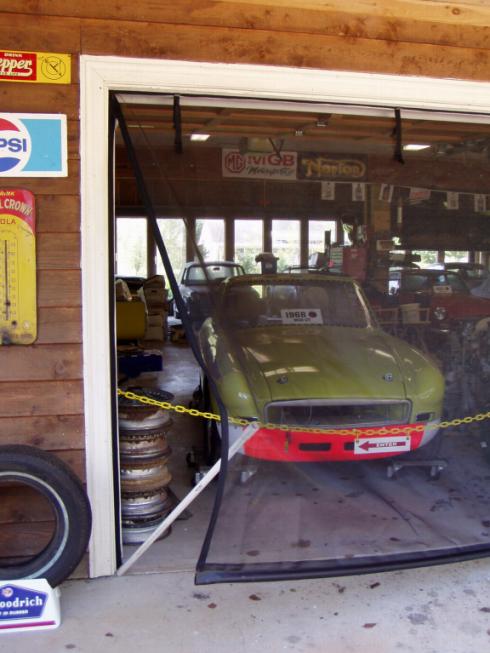
garage doors. Well, I recently found a web site that solved
my leaf problem: Kitty
Mac Fresh Air Screens.
One half hour per door and no more leaves, insects or stray birds
inside my garage. And they don't block any sunlight or
darken the garage at all. I can roll them up to drive in or
out and unzip one side to walk through. Man, where have
these things been all my life!!
|
|
|
|
|
Screen
door down |
Screen
door rolled up |
One side
of screen door unzipped. |
Installation is so easy anybody can do it. Each door comes
with a roll of self adhesive hook and loop material long
enough to go down both door jambs and across the door
header. After its stuck to the door jamb, attach the screen
to the jamb and put roofing nails (I used sheetrock screws
with the roofing nail plastic squares) through the screen where
the straps are attached. Then, simply attach the screen door
to the hook and loop along both jambs. Finally, insert a
piece of 3/4" plastic electrical conduit through the pouch
swen in the bottom of the door to weight it down and make it easy
to roll up and secure to the straps at the op of the door.
VOILA! Screen door!
 |
And we also
finished the gutters and landscaping around the rear of
the Garage
Mahal. Jerri even pitched in and added some color
with lots of rose bushes in front of the evergreen
soon-to-be short hedge. The building finally blends
into the entire lawn. |
21
July 2007:
|
|
While we were
in Europe this summer, we noticed that many buildings had
some type vine growing over their fronts. We've wanted
to develop a European flavor for the GarageMahal and liked
that idea; so, I just finished building a trellis (guess
that's what its called) across the
3 main overhead doors over which Jerri is growing
Wisteria. She had planted the Wisteria before we left
on our vacation and it was reaching the roof so I had to
jump right on the construction. She thinks by this time next year it will
have grown all the way across the front of the garage
providing shade and also softening the face of the building. |
Fall
2007: We've
had a crew of painters over for 6 weeks redoing everything, the
house & garage. They pressure washed everything, replaced
cracked cedar boards, caulked, primed and painted. The place
is now Hunter Green. Here's a few photos.
|

|

|
|

|
|
|
|
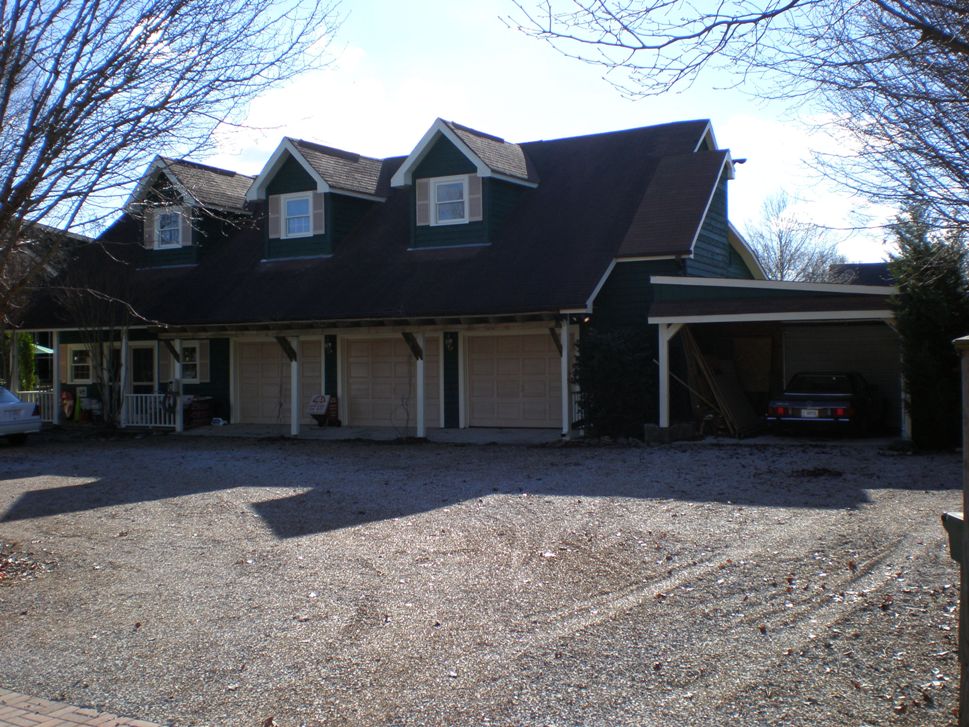
Right View |
Rear of
Garage |
Rear of House |
Left View of
House |
Front of
House |
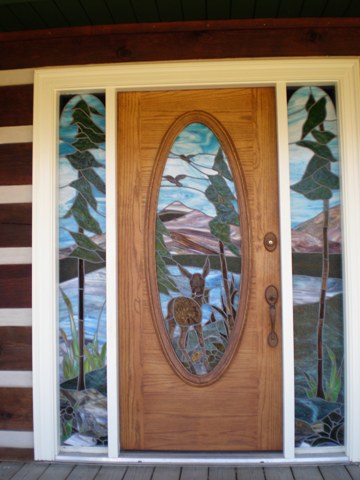
Front Door |
|
|
 |
|
Left View
of Garage |
Front of
Garage |
And while we had crews at the hose, we removed all the screening
from the dining and sleeping porches, laid tile floors and will redo
the screening next summer.
14
September 2008:
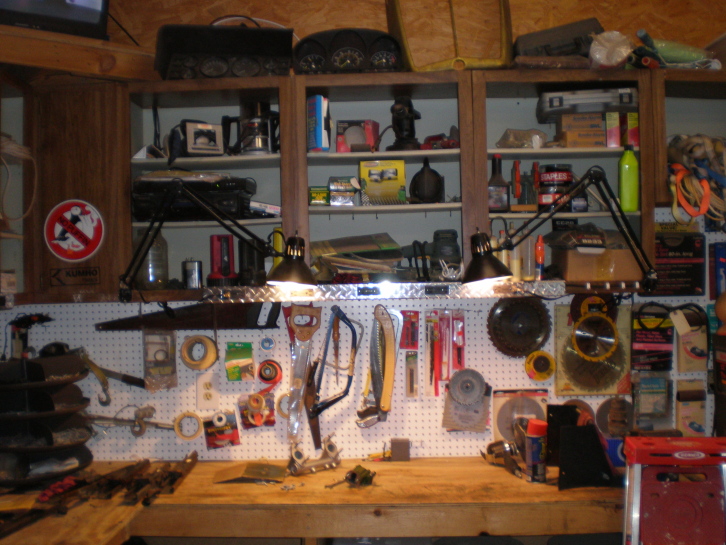
I found these lights on sale at Hobby Lobby for $10 apiece so
I got enough to go all the way around my shop. And, the
diamond tuft plug strips came from Lowe's; they're all around the
shop also.
2
December 2008: A
friend who lives in Connecticut recently installed a solar heater
panel on his garage, and told me about it and how much it helped
with the inside temperature of his workshop. He got the idea
from Mother Earth News magazine. You can read the
article he sent me here.
The rear of my garage is a bank of windows made from siding door
panels which will be perfect for solar heaters.
 |
There are 14
windows along my south-facing wall. My plan is to use
the center 2 windows for a solar heater and then use every
other one from those two out to the corner windows for
additional solar heaters. That way, I'll still have 7
open windows to allow the light into the garage. One
modification from the way the article says to build the
heaters is that I'm going to use my sliding glass door panels
instead of the clear corrugated polycarbonate panels. I
also do not want to open my garage up to the outdoors while
I'm building the solar heaters. |
| Step 1 is
to prepare the interior side of the south-facing wall so that
I can later go outside and build the solar heaters without
affecting my garage's interior space. Since each of my
solar heaters will be 28"x82", I cut
4"x14" vents at the top and bottom of the 5/8"
fiber blackboard that will be the back of my
collector. The magazine article explains the
placement of the vents. Then, I painted the blackboard
with some flat black paint. Yes, I know the blackboard
is already black from the manufacturer; but, it has white
writing stamped on it & the original black paint doesn't
permeate the board itself. Next, I temporarily
stood the blackboard in the window frame, holding it in place
with tiny strips of wood. On to the other windows that
will become solar heaters. |
 |
More steps to
come..... 16
December 2008: Had
to put the solar heater project on hold for a few days. Some
time ago, I told a very good local contractor who primarily does
renovations of 'antique' houses that when he got caught up and
had some free time, we wanted him to finish an upstairs 20x20 game
room we had designed into the original GarageMahal
construction. We also wanted him to finish Jerri's 8x16
pantry, the stairs going to the 2nd floor and build a half bath on
the pantry level. All something we've had in the back of our
minds since I started building 15 years ago! Well,
last week he called and said he and his sheetrock guys wanted to
stop by to look the job over. He's too good to miss out on so
when he came over, we talked, ironed out details
and they began insulating yesterday. One change we made
while he was here is that Jerri wants a small apartment-sized
kitchenette (stove, microwave, sink, refrigerator). So that's
been incorporated into the plan and all the wiring done for it as well as
for the TV I
wanted. Photos
of our progress to date:
|
|
|

|
|

|

|
|
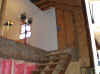
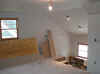
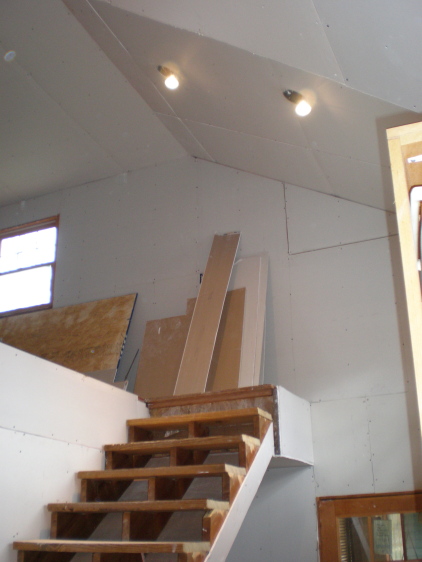
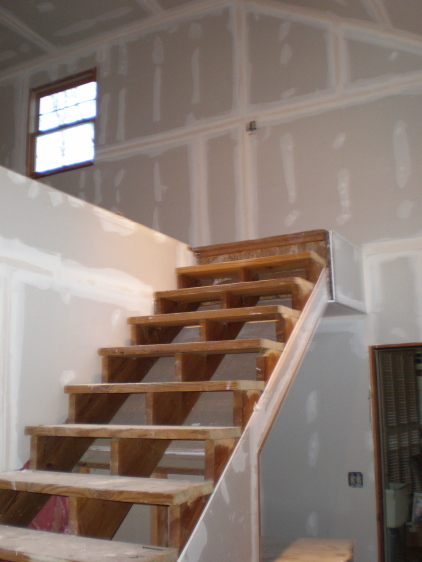
Looking up
the
stairs from the
pantry area |
Part of game
room
where sheetrock
is hung |
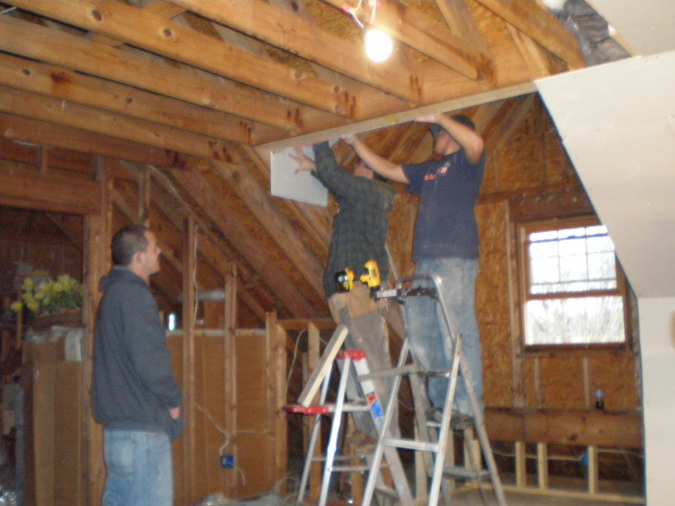
Crew figuring
out
one of the many
ceiling angles |
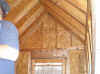
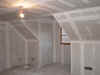
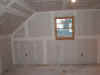
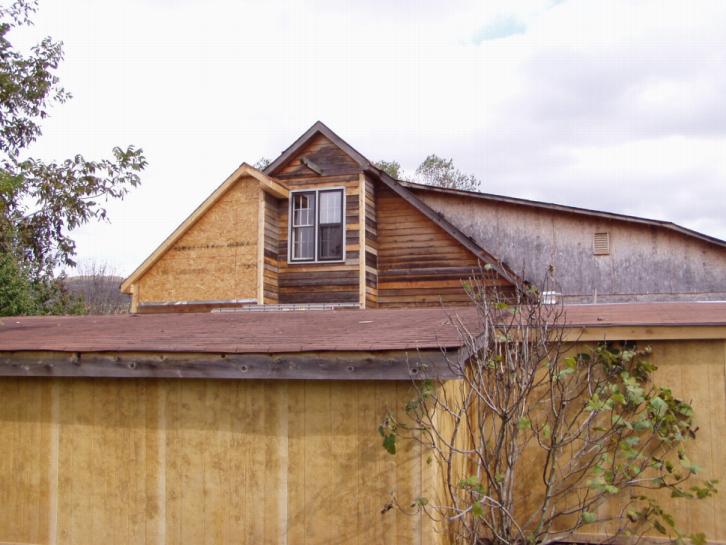
The large
cathedral dormer |
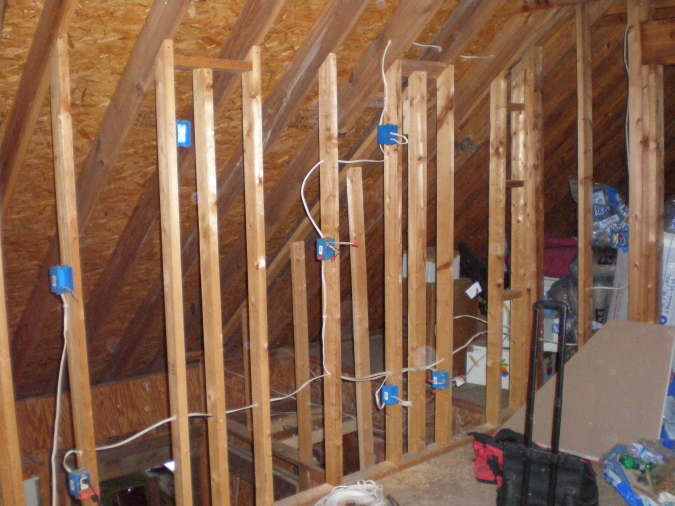
Wall where
the kitchenette will go |
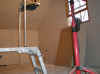
Looking down
into the
pantry area at the roughed-in 1/2 bath |
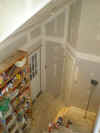
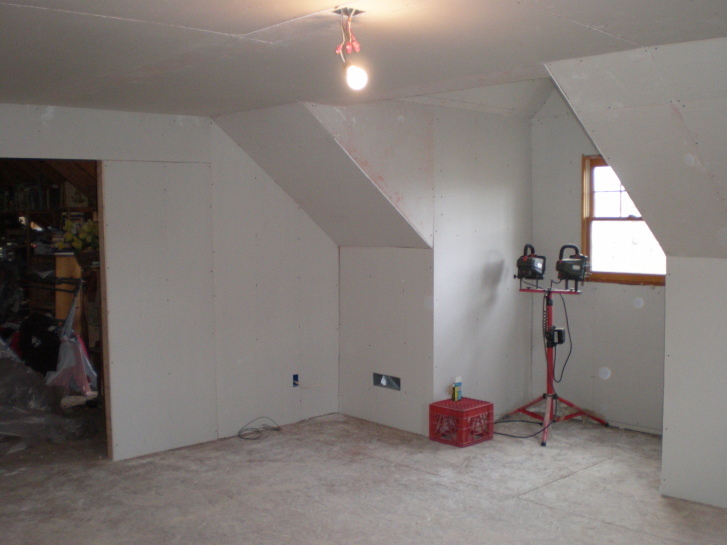
Part of the construction was some destruction, especially in the
pantry and 1/2 bath area. The last photo above shows the area
where much of that destruction is occurring and where some of my
earlier mistakes are being corrected. Once the entire
project is complete it'll also be where we house my HO train setup.
I'm thinking my grandson will soon take over this 'attic nook'.
22
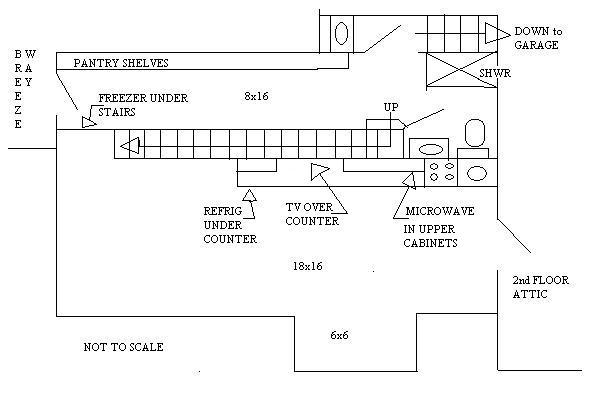
DECEMBER 2008:
Sheetrock work is coming along and the bathroom is laid out; all plumbing
rough-in work is also finished. So, I thought I'd show the modified
1st floor plan of the pantry/entry/bath area: 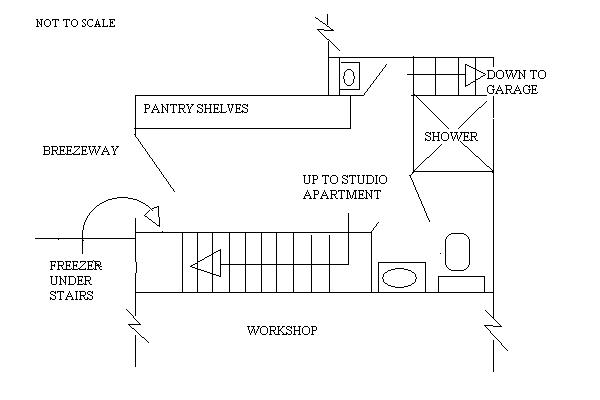
About the only thing
that's changed from my earlier
original sketch of the GarageMahal footprint
is the bathroom/stairs layout. Because we decided to go with a full bath (shower), we
had to redo the stairway and bath footprint, moving my air
compressor and expanding the bath into the space it had earlier
occupied. I'll try to add
photos of the finished sheetrock as soon as the workers remove all
their scaffolding.
27
December 2008:
All the sheetrock is hung and the rough plumbing finished.
Now, we wait for the sheetrock finishers to do their thing.
The stove, microwave, under counter refrigerator and sink are all
ordered - white appliances all. And the cabinet maker is
stopping by next week to get his measurements. Here are photos
of the project as it is today:
|
|
|

|
|
|

|
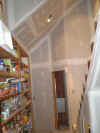
|
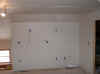
Looking
into pantry area from breezeway entry. Door on angle is
entrance to full bath. |
Looking back at breezeway
entry and stairs. |
Looking up stairs at
landing onto studio apartment level. |
From center of studio
apartment, looking back at landing. |
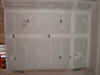
Kitchenette area of studio
apartment. |
Large cathedral ceiling
dormer area of studio apartment. |
Here's a sketch
of the entire project - 1st & 2nd floor - layout (not to scale):
30
December 2008:
Sheetrock finishers came by today to taped the walls and make the
finished corners. Two of the doors (bathroom & to attic) are here, and the
custom exterior door between the new space and the garage will
arrive Tuesday. The refrigerator and microwave arrived
yesterday, and the stove/sink will be here Wednesday. The vent hood will take
another week before it arrives.
So, things are moving along. The next thing that happens is my
contractor will set the door between the studio apartment and the
unheated attic to keep heat in the apartment so the sheetrock mud will
dry. And the finishers will be back in a few days to do the
second layer of sheetrock mud over everything.
Here are photos of how it looks after today's work:
 |
 |
 |
 |
 |
 |
 |
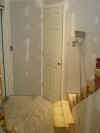
| From
breezeway looking through pantry to bathroom door |
Looking
up stairs to landing |
Looking
back out over top of landing and pantry |
Kitchenette
wall to right of previous photo |
West
wall with entrance to attic area |
Dormer
area |
East
wall that connects back to landing |
9
January 2009:
Doors are installed, and we spent some time outside repairing a leak
we found. Here are photos of the doors:
 |
 |
 |
 |
 |
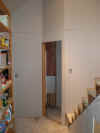
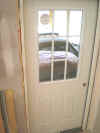
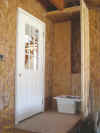
| Bathroom
Door |
Door
to garage. |
Looking
down from studio apartment landing at both doors |
Garage
door from garage side. New utility sink sitting in place where
its cabinet will be built. |
Door
from studio apartment to attic portion of 2nd floor. |
|


