|
|
|
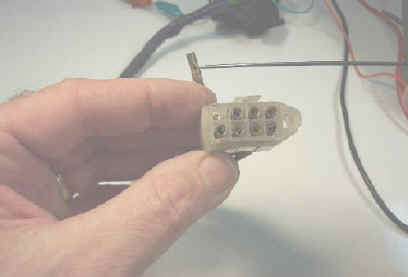
Unplug the switch’s 9-pin connector that lurks under the left side of the dash. There will be three similar looking plugs there; one for the turn signals, one for the ignition switch, and one for the wiper/washer/OD. You can figure out which one is which by the color of the wires. The yellow and white wires are for the OD. The white wire is the hot, or supply, side, the yellow provides the voltage to the OD solenoid when the switch stalk is pulled forward. Use a couple of alligator clips to attach your ohmmeter’s leads to the yellow and white wire’s pins on the connector and engage the switch. You should read very low resistance, less than a couple off ohms at the most. The same thing applies to the wipers and the washer function. In the wiper’s “Off” position the red/green and the brown/green make contact. In the wiper’s “1” position the red/green and the green make contact and in the “2” position the green/brown and green make contact. When the stalk is pushed in the washer pump’s light green/black and black wires make contact. If any of these are showing a high resistance then dive in and fix the switch. You can act French and say “I give up” and pay over $130.00 for a new one or you can bloody well ‘ave on wit ‘t job. Remove the cowl from the steering column and remove the switch. Nothing to it. If you can do that, the rest is a piece of cake. I found that by gently rotating the back of the cowls downward and forward they come away with a minimum of fuss You’ll need a Phillips screwdriver, and very small slotted screwdriver or stiff pick of some sort, some needle nosed pliers, some alcohol or thinner to clean stuff, some 1500 grit wet/dry, and some lithium grease. And your trusty ohmmeter.
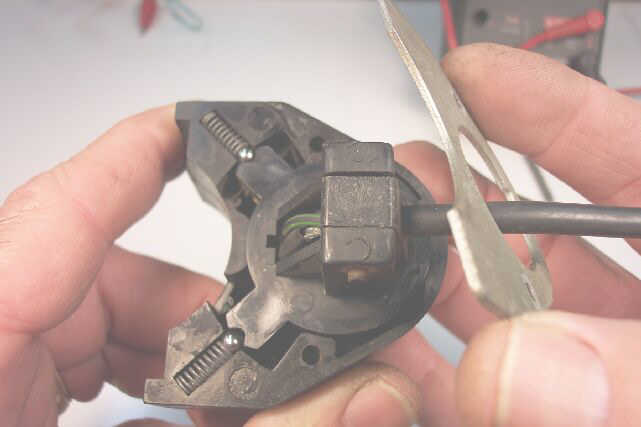
Remove the two screws from the metal cover plate:
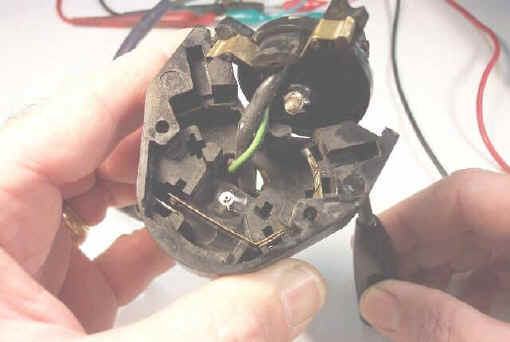
Here’s where you need to be careful. Hold the switch firmly so the stalk doesn’t move and lift the cover off:
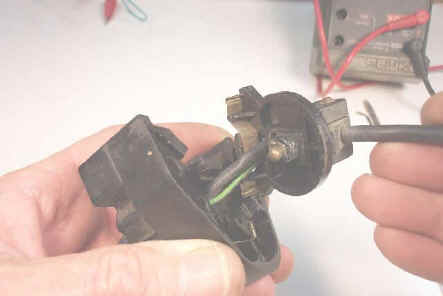
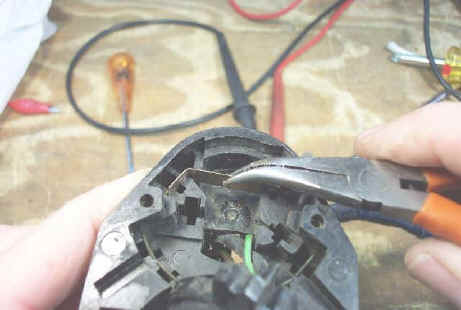
Using the small slotted screwdriver remove the two springs from the end opposite the ball bearings. Be careful, the springs can launch the ball bearings into outer space, or at least some space where they’ll never be found. You can see how the ball bearings pop in and out of the rounded notches as the switch is rotated to hold the wiper contacts in place. The main problem with the switch assembly is that these ball bearings and the OD’s brass spring/plunger combo get dried out after 30+ years and bind up, breaking the plastic parts. Now you can ease out the stalk assembly. Push on the two wires that come in through the back to help ease it out. Wiggle it. Here’s what’s underneath:
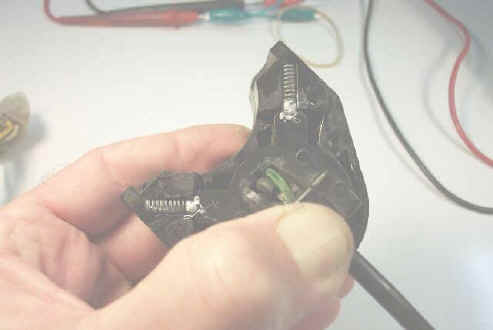
The little brass plunger has a spring behind it and serves as a detent to hold the stalk in the OD position. Pull the brass plunger and spring out. The thin brass band is the contact strip that makes the wiper’s “Off, 1, 2” connection. It comes out by lifting it away from the plastic thusly: Set this stuff aside for cleaning. Now let’s tackle the OD contacts. You can see how the OD switch works; the stalk pushes it’s lower part forward to make these two contacts meet. This transfers 12vdc to the yellow wire.
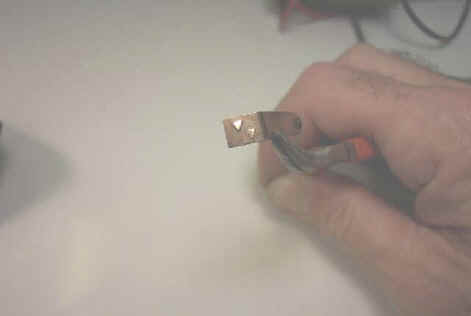
The moving contact is easy to remove and clean; use the needle nose pliers to gently rock it up and out.
Once out you can use some 1500 to clean the contact area. There are also two little teeth on the other end of this strip that bite into the flat, crimped connector that holds the wire. Clean these and using your pick, gently bend the teeth back out to they will get a good bite when you put the contact back in.
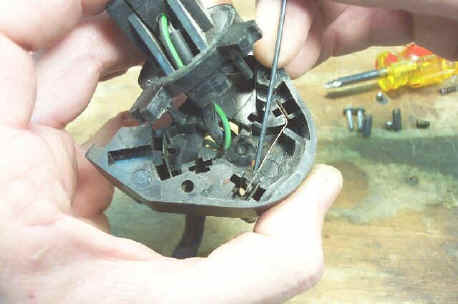
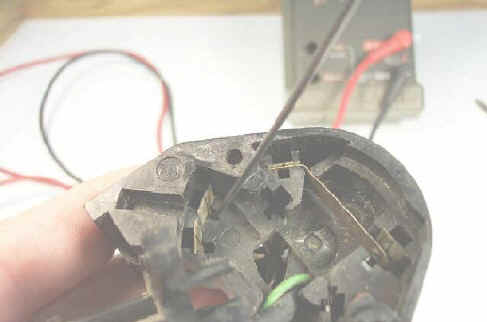
Also clean the stationary flat brass contact that makes up the other part of the OD circuit. At this point you can move on to the wipers contacts. Here you can see the four flat contacts that the brass strip makes contact with as it moves from Off-1-2. Clean these with 1500. Clean the ends of the brass strip you removed earlier and replace it. At this point it is a good idea to make some resistance measurements on the contacts to see if there may be other problems. Use the ohmmeter and measure from the flat brass contact on the inside of the switch to the round female pin in the plug that goes to the wiring harness. If you see more than a couple of ohms of resistance you may need to remove those flat brass contacts and re-crimp the wires. These flat brass contacts are held into the body of the switch by a little tab. This tab can be pressed back into the contact with the sharp end of the pick and the contact can be slid back out of the switch body. These tabs are accessed through the slot directly in front of the contacts. Gently lever the tab back toward the plate while pulling the wire. The plate will slide right out.
The flat contact with the pick under the tab:
You may also need to re-crimp the female connectors in the plug. They are removed in the same manner, by pressing the tab back into the connector:
Use a standard crimping tool or needle noses and just barely squish the part of the crimped connector where it bites into the wire. The object is to break the corrosion on the surface of the wire. Not much pressure is needed to accomplish this task. You’re now ready to reassemble the switch. Grease the brass plunger and spring that fits up into the OD stalk’s body and fit them back in. Put a dab of grease into the socket where the plunger fits into the body of the switch. The plunger moves in and out of this socket as the OD part of the switch is engaged and disengaged. Grease the two springs and ball bearings that fix the position of the wiper switch and set them aside.
Ease the stalk section back into the body of the switch while gently pulling the wire back through so it doesn’t get fouled. Now that it’s back in you can carefully replace the springs and ball bearings. Seat them in their slots carefully. Try no to move anything once you have them in or they’ll pop back out.
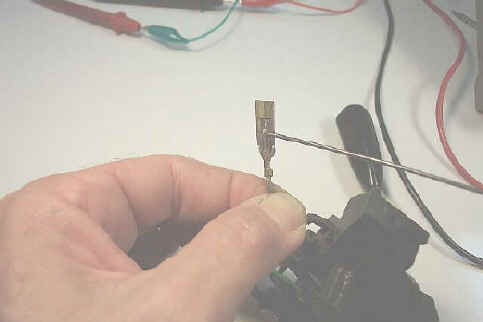
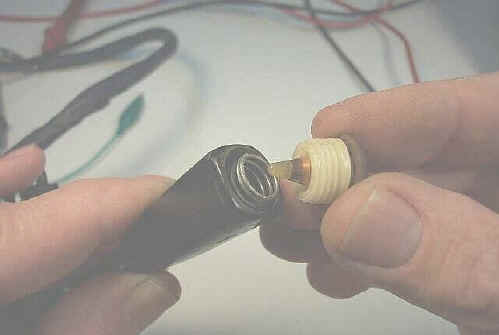
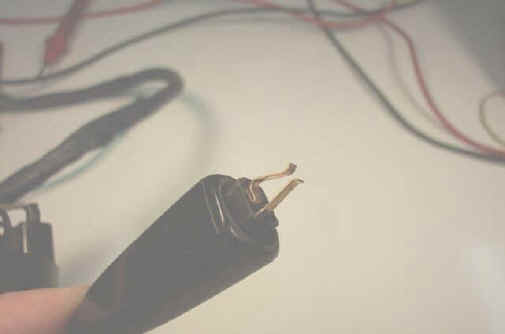
Now slide the cover back on being oh so careful not to move the switch. Put the two screws in and you’re done. Once you’ve put it all back together put the switch arm through it’s different positions to make sure everything operates smoothly including the OD action. The last thing to do is to clean and check the washer pump contacts. The metal button on the end of the stalk unscrews to reveal it’s conical contact and the spring. The body of this part will slide down the stalk to reveal the two fingers that the cone makes contact with. The little copper band on the cone makes the connection between the two fingers shown in the last pic to give 12vdc to the washer pump.
The finger contacts that the copper band touches to make the washer pump turn on. Clean them lightly with the 1500. I use the Dremel with a fine wire wheel.
That’s about it. All that remains is to re-install the switch back into the steering column and the plastic cowls back over them. Be patient with the plastic cowls. You’ll find the combination of twists and turns that make them slide right back on. Dress the wiring harness carefully so it doesn’t keep the cowl pieces from fitting correctly. Take it slow and easy. It’s really a simple switch, just lay the parts out neatly and it will be a breeze to take apart and put back together. If you really want to make sure everything is right test each set of contacts with your ohmmeter as you clean them to make sure you have no resistance. It’s a piece of cake. The biggest job is getting the switch in and out of the car but even that’s no big deal if you take your time. If I can do it, anyone can. If you get stuck or need help email me “wraylemke@compuserve.com” or call during the day (843)881-5755.
|