1968 MGC Roadster
![]() As
of: 25 November 2002
As
of: 25 November 2002 ![]()
In my quest to own one of every type MG built since World War II, I've been on the "look out" for an MGC--roadster or GT--didn't matter. Right after our January meeting, a member of my local car club called with a lead. Seems he knew of an MGC that might be for sale.
The owner had gotten it from his uncle a few years ago before the old gentleman passed away. He drove it for several years and started to restore it. Recently, however, he became partially disabled, and isn't able to finish the restoration. I contacted him, looked at the car, and brought it home.
Its a 1968 MGC roadster with wire wheels and non-overdrive transmission. The British Motor Institute Heritage Trust (BMIHT) certificate says it was originally Snowberry White with black seats that had white piping. Well, that's what it looked like.
The key word is "looked". Today, its at my body shop completely disassembled with all the paint stripped from its body. We're going to massage every panel and repaint it Dark British Racing Green.
The previous owner's uncle, a medical doctor, was a meticulous man in the maintenance he performed on his cars as well as the records he kept. He owned 2 MGC's and a TD, and mine was his daily driver. Over the many years of his ownership, he had replaced the front fenders and valance with fiberglass units, and had repainted the car at least once to the original Snowberry White.
As part of the restoration his nephew had begun, the engine was rebuilt, the seats reupholstered in original Black and white, and the floor pans, rockers, sills, and doglegs professionally repaired or replaced. Oh, according to serial numbers on the BMIHT certificate, the engine and transmission are original to the car when it left the factory. We may install an overdrive transmission as we put her back together; I've just got to rebuild one (&, I don't relish that task!).
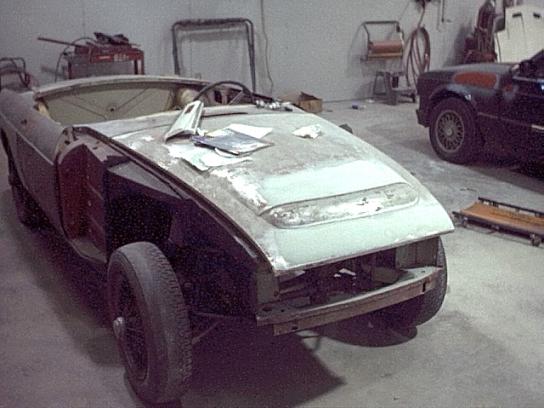
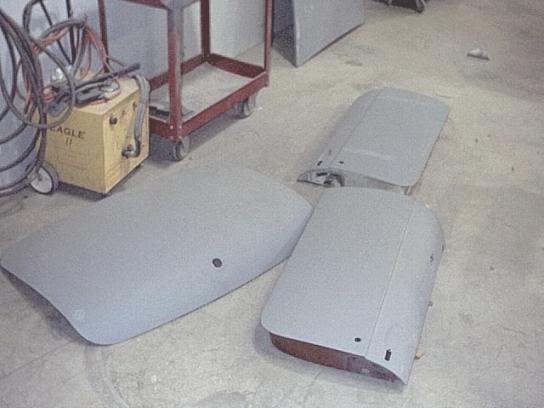
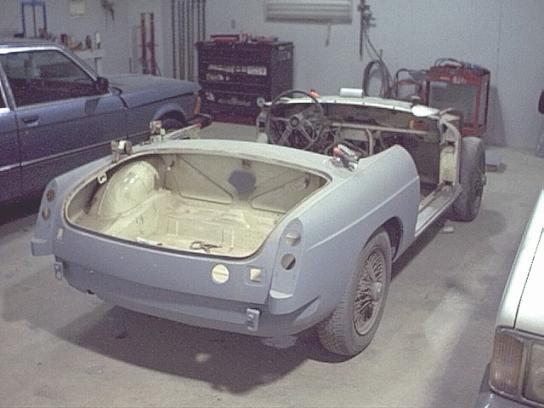
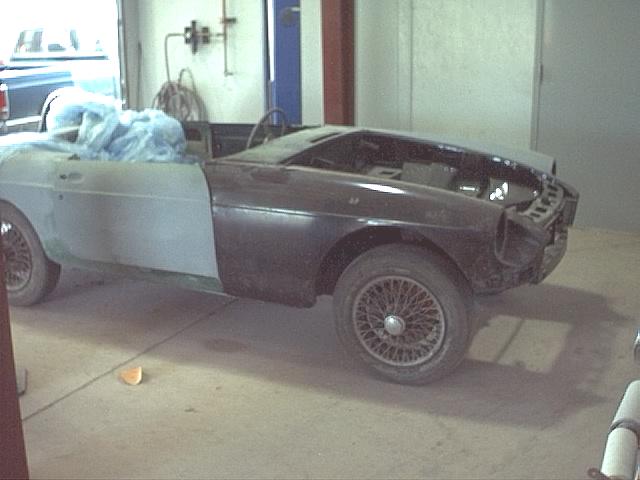
So, we'll begin the process with photos of the dismal little body shell sitting in a corner of the body shop awaiting clean-up from its chemical stripping bath.

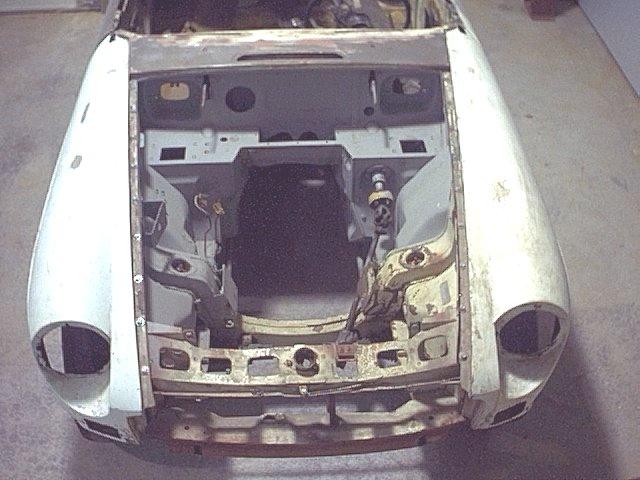
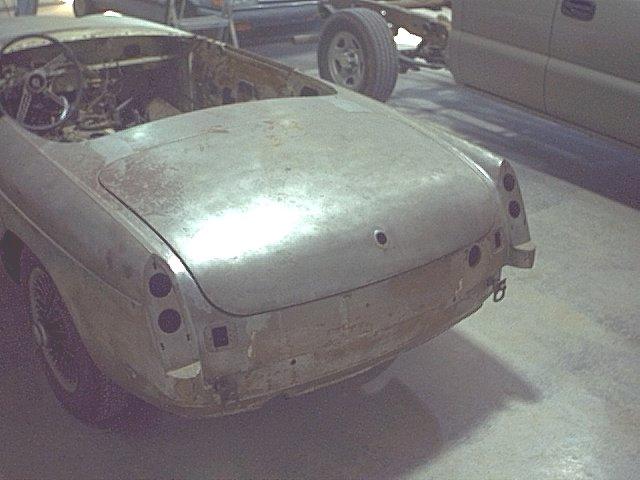
Do you see a method to my madness? Yep, every car I build comes completely apart with all paint removed to show me her undersides (kinda like undressing a lady for the first time: packaging might look nice but you never know what's underneath.).
Now, the next thing that has to happen is those fiberglass fenders have to go to be replaced with new steel ones.
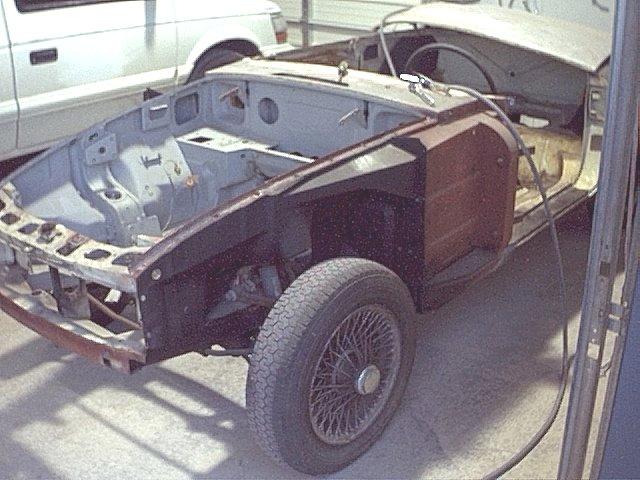
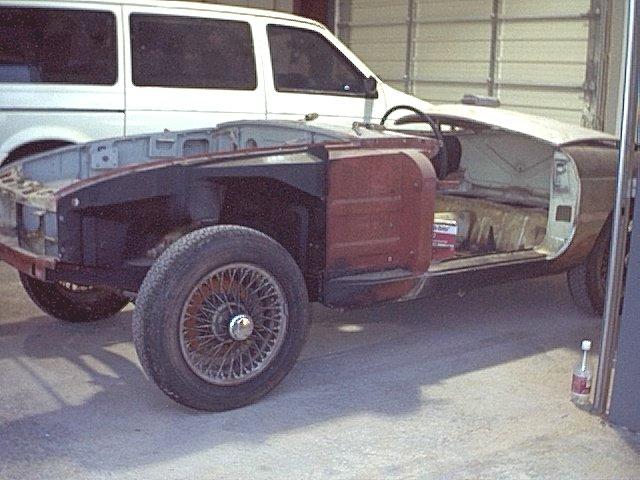
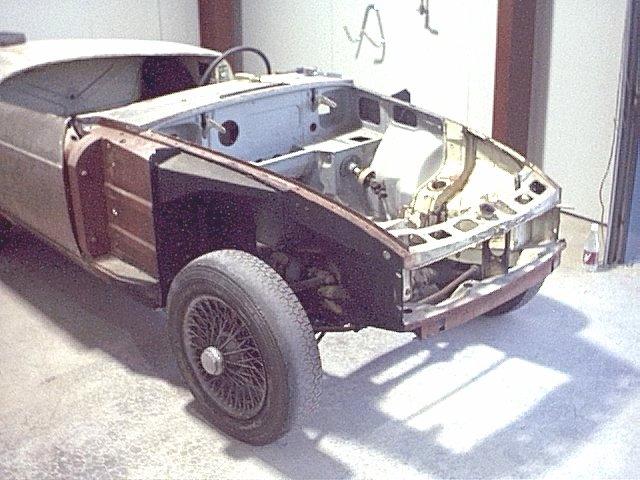
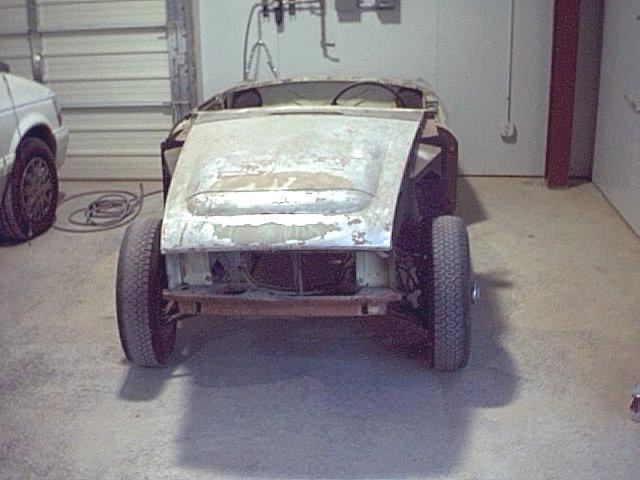
I was pleasantly surprised to see that the previous owner had not misrepresented the work done to the body. The areas under the front fenders are clean, well primered and undercoated, and the rocker/sills were properly replaced. Now, she goes from the disassembly area into the main body repair room.
Friday morning, I've an appointment to meet with the master body man who will head the team restoring her. We'll do our "walk-around", going over every body panel, the engine compartment, and the trunk area to figure out what's to be done to each area. I've given them a ballpark figure in the area of what I want to pay for the total job; our walk around will confirm they can do what I want within that range, for less, or whether my expectations are out of whack. (That's the only way I know to do a restoration like this; doing it 'by the hour' will kill you!.)
My Granddaddy always told me that, when negotiating, the man who mentioned money first always lost. Over the span of my life, that's proven to be a pretty good rule to live by. In this case, however, I've worked with this particular body shop extensively in previous MG restorations so I know what to expect from them. Plus, I have enough experience to do a price estimate on a body restoration. So, my quoting a price range allows them to look at the car before I get there to see if I have realistic goals or to see where they have to adjust their pricing schedule..
Do I lose in this instance? I'm not sure. I do know that they've always been able to bring the job in within my range, sometimes below what I thought. I've been happy to this point. It just seems to work for me. Believe me though when I tell you that the first time I used them, I let them tell me what the job would cost; it was within my mental price range.
![]() 16 January
2002: Now, here's why I like
my local MAACO shop: how they've structured their special autos
restoration program. Remember, they only take on 1 or 2 of these
restorations at a time; and, when they do, they assign a master body man to
oversee the project through its entirety.
16 January
2002: Now, here's why I like
my local MAACO shop: how they've structured their special autos
restoration program. Remember, they only take on 1 or 2 of these
restorations at a time; and, when they do, they assign a master body man to
oversee the project through its entirety.
After our meeting to develop our plan of attack, my master body man decided that before he put his stamp of approval on my restoration, he wanted to see what might be lurking underneath. So, unbeknownst to me, he took the liberty of raising the car on a hoist to look at the quality of previous work from that angle.
Man, am I glad he did!!!
Either the previous owner picked the car up from his body shop before all the finish work was completed; or, his body shop forgot to complete the work underneath as several of the repaired areas are only tack welded together. But, let's look at what my body man found.
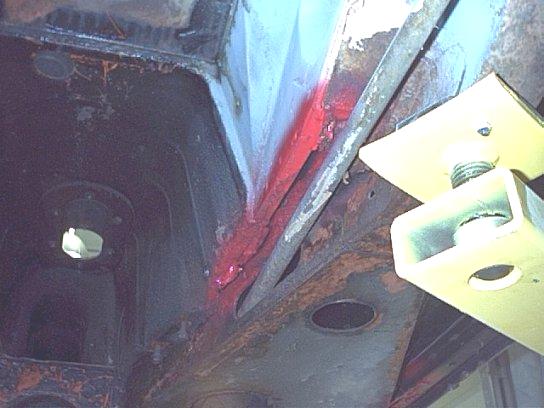
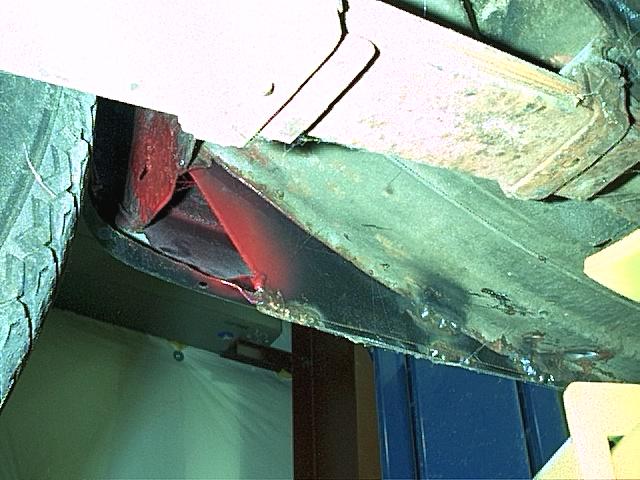
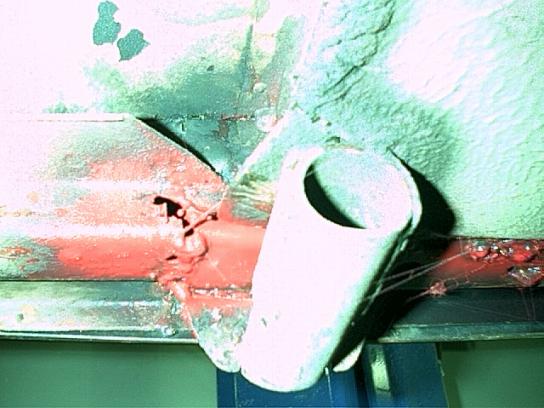
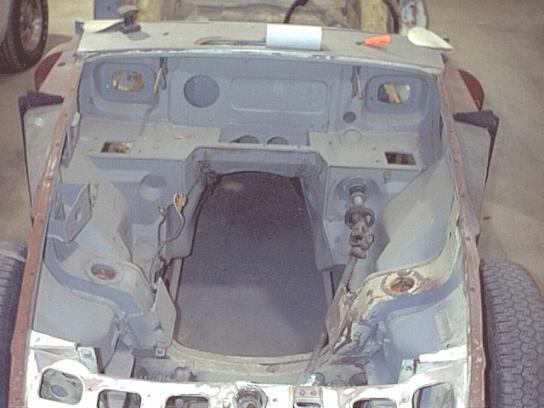
In the photos below, the offending areas have all been highlighted with red spray paint. The undercarriage of the car, though displaying weird colors because of my digital camera's flash effect, shows a car that is now rust-free and has its original Snowberry White paint under a thin layer of undercoating.
First, looking along the front inner sections of the transmission tunnel where the old floors were cut out to be replaced with new panels, we find where the other body shop didn't clean up and weld their cuts or where their cutting tool went to deep.

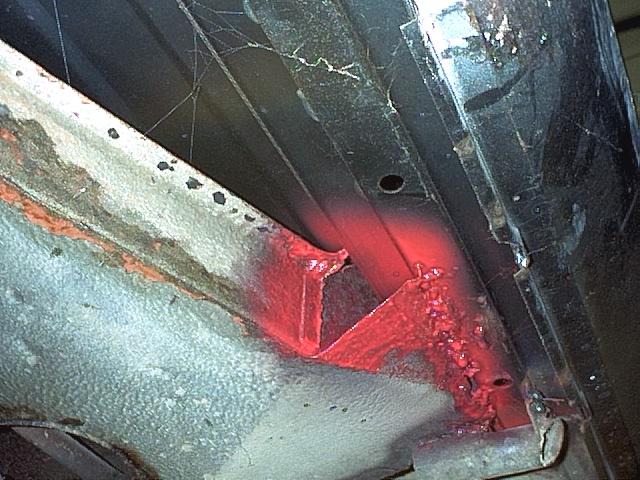
(Driver side
-
(Driver side
-
(Passenger side -
looking rearward) another
view)
looking forward)
What we see in those 3 photos is where the panels were cut out but the undersides not smoothed & welded as were the top sides, the passenger side being the worst. We'll have to hammer & dolly them and run a solid weld to prevent water infiltration. (From above, all seams are completely run & proper caulking applied.)
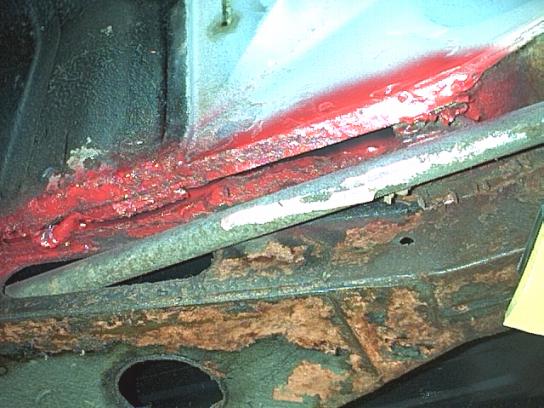
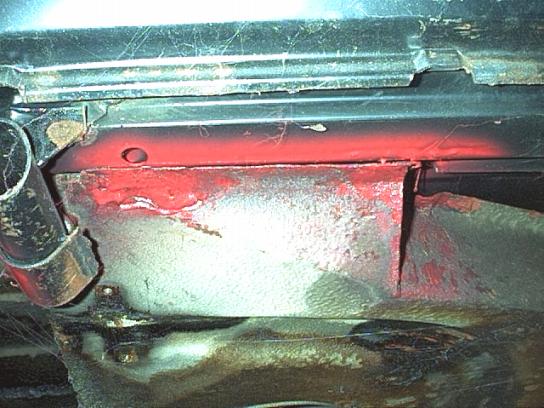
(Driver side rear of sill)
(Driver side front of sill)
This is the one I didn't want to see: there appears to be no inner sill on the driver side!! The photo on the left shows the rear of the sill while the photo on the right shows the front. We're going to use mirrors and lights to ascertain whether or not the inner sill was inadvertently left off or whether the ends were chopped off. Either way, the rocker comes off & a new inner sill goes in. Luckily, I have some new inner sills in my parts collection.
Plus, its easy to see where the previous body shop spot welded the panels together or didn't weld at all. We're gonna have to do some welding and caulking all along where new panels meet the original body shell.
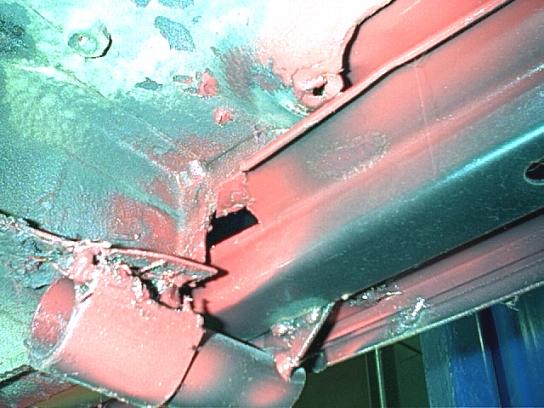
The above photos show some of the places where minor welding work is required. Nothing serious; just places where the new body parts were tack welded, and the previous body shop forgot to go back and run a solid weld; or, places where, when the rusty body panels were cut away and the new ones installed, there are minor gaps that must be patched and welded up.
Whew!!! Thank goodness for competent body men. The lesson from this one is to always check repairs made by previous owners from all angles.
What we found isn't of major proportions or a huge concern for me. Had I been able to really study the undersides of the car and found these shortcomings, I would have bought it anyway. There's nothing here to deter me from this project; and, all the major structural restoration work is finished. After all, Practical Classics magazine estimates there are only 600 or so MGC's still on the road in England out of the 4,800 or so built for that market. What makes one think the 4,800 or so shipped over here have fared any better?
(NOTE: You'd just better hope that, if you tackle a car someone else has started, you have a good body shop who you can trust to do their part professionally. Oh, and if you're not real experienced in looking for problems: get a friend to go along with you. Even old guys like me who've been building these things since we were teenagers can miss some problems.)
So, we'll now spend a little time under the car welding, caulking, and generally cleaning up after the previous owner's body shop. Then, before we start the exterior of the body, we'll clean the underside up and spray on a new coat of undercoating.
18 January 2002: Met with the young welder on my restoration team, and walked around the car's undersides with him (my team consists of: master body man, prep crew, welder, painter; & me for disassembly/reassembly of body trim). His plan is to weld where originally there were welds, caulk where the factory originally caulked, and shape small pieces of metal to fit where the old, rusty panels were removed and the new new didn't mate exactly. He plans to start at the front and work rearward.
(NOTE: When having your body man cut out rusty panels, ensure that he has the new panel as a pattern or that, if he has to take out more than what is to be replaced by a new panel, he makes his small patch panels prior to installing the new panel. Does that make sense? Basically, get up underneath and make sure he's replaced all the metal that he removed!)
Well, there'll be several trips to the body shop over the next few days as he works around the undercarriage to give my approval or point out things I want done differently or in addition to what he's planned.
11 February 2002: Paint Codes. Be careful.
I went to The Original MGB to determine which colors were available on 1968 MGC roadsters. Mine was originally Snowberry White but I want to paint it British Racing Green. And, that was a factory available color with my black/white piping leather seats.
So, next, I went to my trusty Moss catalog and found that the factory code for 1968 'dark' British Racing Green is GN.25. I handed that number to my body man and learned it's available in lacquer paint only. Okay, no problem: I gave him the Dupont number (#8194). Again, lacquer only. Still no problem: I gave him the Ditzler/PPG number (#43342): lacquer and acrylic enamel only.
Checking earlier paint codes listed in Moss' catalog with my local Dupont distributor, I learned that any MG paint codes prior to the 'BLVC' factory codes are all probably available in lacquer or acrylic enamel only--those Moss codes are for lacquer paints.
Now, we have a problem.
Body shops in the US can no longer spray lacquer paint due to EPA rulings. And, most have done away with their materials for spraying acrylic enamel in lieu of more modern urethane and base/clear paints. Sure, its possible to find an antique auto restorer who still works in lacquer from his stock of paints; but, they're becoming less numerous and more expensive as the supply of lacquer paint dries up (no pun intended!).
But, its a problem solved.
It seems that when the old paints were changed to the new 'BLVC' paints in 1970, some new colors were issued and some older colors were reissued with new 'BLVC' numbers and new names (GN.25, British Racing Green became BLVC 25, New British Racing Green). Thankfully, my "medium dark" British Racing Green was reissued as New British Racing Green with a new 'BLVC' code (BLVC 25 or Dupont #30012). And, though it's described as "very dark green", I'm told by several knowledgeable people that there's actually no difference in appearance.
4 March 2002: Well, here's what the body looks like today. They had to take her off the overhead and will finish the welding to the underside later. The body is getting a smooth coat of glazing putty to catch any small imperfections. So far, there've been no areas that need repair.
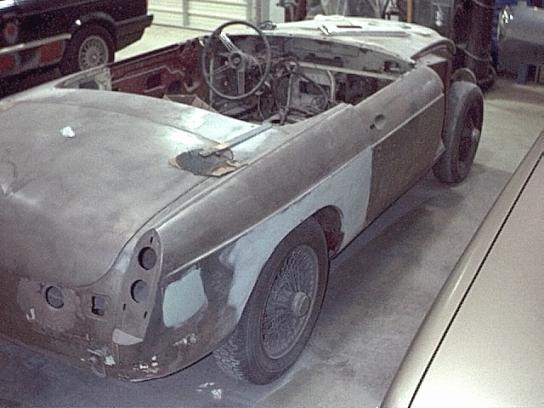
We did replace the driver door which still has to be stripped; however, the rest of the body is proving to be straight enough for a quick once around.
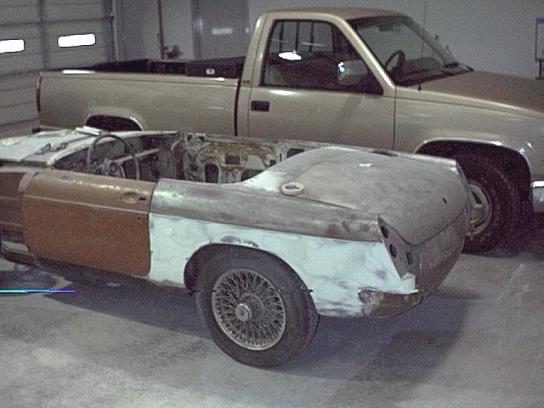
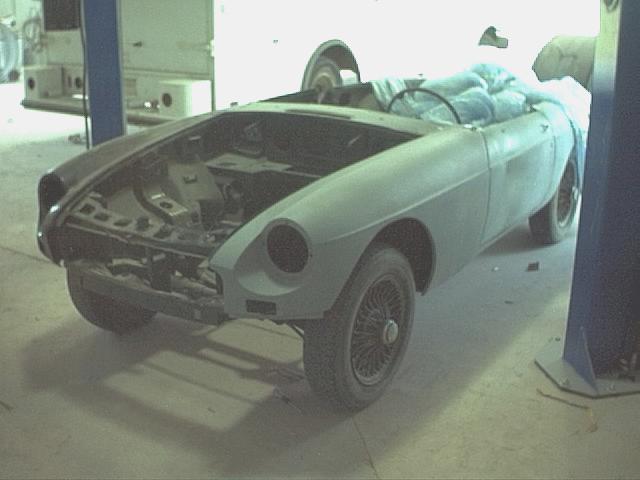
1 April 2002: She's almost ready for paint as the photos below show. However, before painting, we've still got to raise her back up on the lift & do the undercarriage welding. Plus, 2 new front fenders and a new front valance are on order.

27 June 2002: Well, I've been kinda letting her sit in the background while I've worked on other things. The body man, however, has continued to work on her. All the undercarriage welding and seam sealing is finished, and the panels and body shell itself are cut-in. Now, its time for reassembly.
Yesterday, I hung the doors and front fenders. I also started the fitting process for the hood.

Once the front valance fitting kit (Moss #323-618) arrives, I'll hang the valance, complete fitting of the hood and trunk, and turn it over to the master body man for final fitting of the items I've worked on. Then, its on to the paint booth.
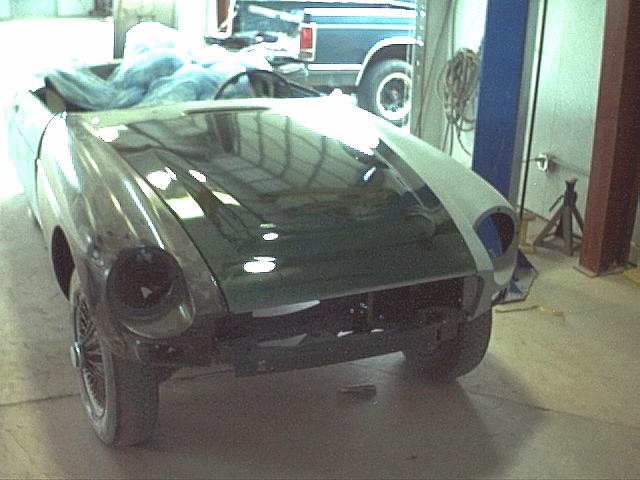
23 July 2002: Its Dark British Racing Green!!
12 August 2002: &, its going home. However, it will probably sit in exactly this condition for a bit 'til I get either my V8 project or Jerri's '70 GT finished.


13 August 2002: I just received a phone call from someone who regularly reads my web site.
"Tony," he asked. "why do you keep painting cars that you're not gonna get to work on for some time?"
Good question. Hope I have a plausible answer.
As body work is one of the few things I send out to have done and it always takes so long to accomplish, I try to have a couple of painted cars in the queue waiting their turn for reassembly while their paint hardens. (Oh, 'queue' for us non-Brits is a long line on opening night to buy tickets for the next Star Wars episode.)
So, don't get excited if nothing happens here for a while. After one of the 2 cars above is finished, the MGC is next as I'm moving it ahead of my '63 MGB that also is awaiting reassembly. Everything for the car is sitting in boxes in the trunk or passenger compartment properly labeled and protected. The engine and transmission are finished and are sitting in my garage. Were I to die tomorrow, Jerri wouldn't have any problems finding all the parts and pieces to my unfinished cars.
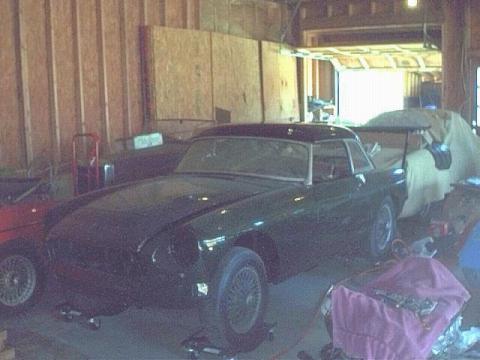
![]() 25 November
2002: My friend, Mike Cook,
emailed to say he had a perfect MG'Works" hardtop for sale. 'Works'
is English for 'factory'. The price was great, so a trip to Atlanta made
it mine. And, its new home is my '68 MGC.
25 November
2002: My friend, Mike Cook,
emailed to say he had a perfect MG'Works" hardtop for sale. 'Works'
is English for 'factory'. The price was great, so a trip to Atlanta made
it mine. And, its new home is my '68 MGC.
Here are photos of the top sitting on the car:


As always, stay tuned...